Mostrando entradas con la etiqueta Salado {Savory}. Mostrar todas las entradas

UNA QUICHE MUY FÁCIL - PIMIENTOS Y EMMENTAL {A VERY EASY QUICHE - PEPPERS AND EMMENTAL}

junio 19, 2026


Una quiché un poco diferente, ya que la base no es la habitual, sino que se prepara con rebanadas de pan duro cortadas muy finitas. Tengo esta receta desde hace muchos años y llevaba tiempo con ganas de probarla. Aunque incluye un paso previo en la sartén, la verdad es que es muy fácil de hacer.
  1. A slightly different quiche, as the base is not the usual pastry crust but is made with very thin slices of stale bread. I've had this recipe for many years and had been wanting to try it for a long time. Although it includes a step in a frying pan, it's actually very easy to make.

QUICHE  DE PIQUILLOS Y EMMENTAL
INGREDIENTES - PARA 4 PERSONAS
Una barra de pan del día anterior, yo he usado un pan redondo
100 gramos de bacon cortado en dados
300 gramos de cebolleta picada
250 gramos de pimientos del piquillo cortados en tiras finas
200 gramos de tomates cherry
100 gramos de emmental rallado
2 huevos
250 gramos de nata
Aceite de olive
5 gramos de mantequilla para engrasar el molde
Sal

PROCEDIMIENTO
1. Precalentar el horno a 170º. Untar el molde con la mantequilla y forrar el molde con las lonchas de pan finas.
2. Freímos un poco los trocitos de bacon hasta que estén dorados. Agregar la cebolleta y rehogar durante 7 minutos mas a fuego lento. Añadir los pimientos y tenerlo en el fuego 3 minutos mas.
3. En otro recipiente, mezclar la nata con los huevos y el queso emmental. Cuando está todo bien mezclado, lo agregamos a la mezcla anterior de cebolla y pimientos. Sazonar.
4. Se cortan los tomates cherry por la mitad y se colocan en la base del molde. Se echa encima de los tomates la mezcla de todos los ingredientes anteriores y se hornea durante 45 minutos.

PIQUILLO PEPPERS AND EMMENTAL QUICHE
INGREDIENTS - SERVES 4
1 loaf of leftover bread, I´ve used a crusty rustic bread
100gr bacon cut in small cubes
300gr spring onions finely cut
250gr piquillo peppers cut in thin strips
200gr cherry tomatoes
100gr emmental cheese, grated
2 eggs
A bit of olive oil
250ml whole cream
5gr butter to grease the baking tin
Salt to season

METHOD
1. Preheat the oven to 170º. Brush the base and sides of the baking tin and cover it with the slices of the rustic bread that were finely sliced.
2. Pour the olive oil in a frying pan and fry the cubes of bacon until golden. Add the chopped onion and slowly sautée for 7 minutes over low heat. Add the peppers and cook them for 3 more minutes.
3. In a bowl, combine the whole milk with the eggs and the grated emmental. When everything is perfectly combined, pour it to the previous mixture of onion and peppers. Season with the salt.
4. Cut the cherry tomatoes in half and scatter them in the baking tin. Pour all the combine ingredients over the tomatoes and bake for 45 minutes.
¡LISTO! DONE!

ENSALADA DE ENDIVIAS, CECINA Y HUEVOS - 5 INGREDIENTES {CHICORY, CECINA AND EGG RIBBON SALAD - 5 INGREDIENTS}

abril 05, 2026
La fuente de esta receta como otras veces ha sido Jamie Oliver y su libro 5 ingredientes, en un día sin muchas ganas de cocinar, que esto también nos pasa. He hecho esta ensalada en un ti-ta, eso si en la receta original Jamie utiliza Bresaola, que es un fiambre consistente en finas lonchas de carne de ternera curada originario del norte de Italia, pero eso,  muy buena la bresaola, pero como comprenderéis, aquí en nuestro país tenemos una cecina maravillosa y es lo que he utilizado yo para hacer esta receta. 
  1. The source of this recipe as many others it´s been Jamie Oliver´s 5 ingredients book, in a day that I wasn´t very much into cooking (that also happens every now and then). I´ve made this salad in a blink of an eye, but in the book Jamie uses bresaola in the recipe, which is air-dried, salted beef originated in the north of Italy, but well, I know bresaola is good but you have to understand that in Spain we have the same under the name of Cecina which also is air-dried, cured meat, most commonly beef originated from Leon and well  it´s wonderful, so that´s what I´ve used for my recipe.  

ENSALADA DE ENDIVIAS, CECINA Y HUEVOS
Tiempo de preparación: 15 minutos
Dificultad: Muy fácil

5 INGREDIENTES PARA DOS PERSONAS
80 gramos de cecina, finamente cortada
3 huevos
2 endivias
1 limón
Unas lascas de parmesano

PROCEDIMIENTO
1. Colocar la cecina en el plato como en la foto
2. Batir los huevos y hacer una tortilla como si se hiciera un crepe utilizando una sartén de 26 cm. anti adherente. Añadir un poco de aceite de oliva y extenderlo por toda la sartén con un poco de papel de cocina.  Echar los huevos batidos en la sartén girándola para que cubra toda la base  y cuando está hecha, darle la vuelta con una espátula y mantenerla hasta que el otro lado esté cuajado también. Dejarla enfríar, hacer con ella un rollito y cortarla en lonchas.
3. Cortar las endivias. Echar el zumo de limón y 1/2 cucharada de aceite de oliva virgen, mezclarla bien con las tiras de tortilla, sazonar todo bien con sal y pimienta. Colocar todo en el centro de la cecina y colocar encima unas lascas de queso parmesano, echar por encima un poco mas de aceite de oliva.

CHICORY, CECINA AND EGG RIBBON SALAD
Hands on time: 15 minutes
Difficulty: Very very easy

5 INGREDIENTS SERVES 2
80 grams of the best cecina from Leon, finely sliced
3 eggs
2 chicory
1 lemon
Parmesan flakes to your taste

METHOD
1. Arrange the Cecina slices on your plate as in the picture
2. Beat the eggs well. Get a 26cm non-stick frying pan. Pour in just enough egg to thinly cover the base of the pan, swirling it up around the sides almost like an egg pancake. As soon as it´s set, use a rubber spatula to ease it away at the sides, and out on to a board. Repeat with the remaining egg, cool, roll up and finely slice. 
3. Trim and finaly slice the chicory. Dress with the lemon juice and 1/2 tablespoon of extra virgin olive oil, then toss with the egg ribbons, taste and season with sea salt and black pepper. Pile it in the centre of the cecina, shave over the Parmesan, then finish with a little extra virgin olive oil. 

HECHO/ DONE

PATATAS RELLENAS DE POLLO Y JAMÓN {STUFFED POTATOES WITH CHICKEN, HAM AND CHEESE}

enero 24, 2026
Es obvio que la patata es una de las estrellas de nuestra alimentación, pero si una vez cocidas las vaciamos y mezclamos con queso crema, jamón y pollo y las volvemos a rellenar en sus cáscaras horneadas se convierten en un plato de acompañamiento de lujo. Un mordisco de estas patatas y seguro que las volvéis a hacer.
  1. It´s a fact that potatoes are one of the stars of our diet, but if once roasted we scoop them out and mashed with cream cheese, chicken and ham and then stuffed back into their crispy shells they become a luxury side dish. Trust me, one bite of these cheesy beauties and you´ll be making them again.


PATATAS RELLENAS DE POLLO, JAMÓN Y QUESO
Tiempo de preparación 35 minutos
Dificultad: Fácil

INGREDIENTES PARA 4 PERSONAS
8 patatas pequeñas asadas en horno 180º durante 20 minutos
1/2 pechuga de pollo
100 gramos de jamón de york en dados
1 diente de ajo
100 gramos de queso rallado
100 gramos de queso crema ligero
Aceite de oliva
Pimienta y sal para sazonar
Lo verde de la cebolleta para decorar

PROCEDIMIENTO
1. Precalentar el horno a 180º. Corta las patatas por la mitad una vez horneadas, yo lo hice el día anterior por lo del almidón resistente y antes de vaciarlas las metí 1 minutos al micro para que estuvieran mas blandas. Reservar en un cuenco. 
2. Mezclar el queso crema con la patata, la sal, la pimienta. Reservar. Cortar en lonchitas el tallo de la cebolleta y reservar. 
3. Cortar el pollo y el jamón en daditos y dorarlos en una sartén por separado. Rellenar las patatas con una capa de mezcla de patata y queso, luego unos dados de jamón y pollo, para seguir con otra capa de patata y queso y así hasta terminar echando el queso rallado. Hornearlas durante 15 minutos y servir directamente decoradas con los aritos de cebolleta.

SUFFED POTATOES WITH CHICKEN, HAM AND CHEESE
Hands on time: 35 minutes
Difficulty: Easy

INGREDIENTS SERVES 4
8 small potatoes roasted in the oven at 180º for 20 minutes
1/2 chicken breast cut in cubes
100 gr thick slice of boiled ham or gammon cut in cubes
1 clove of garlic
100gr grated cheese
100gr light cream cheese 
Olive oil
Salt and pepper to season
The stem of a spring onion

METHOD
1. Preheat the oven to 180ºC. Cut the potatoes in half once baked. I did this the day before because of the resistant starch. Before scooping out the flesh, I microwaved them for 1 minute to soften them. Set aside in a bowl.
2. Combine the cream cheese with the potatos flech, salt and pepper. Set aside. Slice the spring onion stems thinly and set aside. 
3. Dice the chicken and ham in small cubes and brown them separately in a pan. Fill the potatoes´s skin with a layer of potato and cheese mixture, then some diced ham and chicken followed by another layer of potato and cheese, and so on finishing with a sprinkle of grated cheese. Bake them for 15 minut3es and serve immediately and garnish with some spring onion rings. 


LISTO/ DONE

FILETES DE COLIFLOR {CAULIFLOWER STEAKS}

marzo 04, 2025
Ultimamente hago la coliflor y el brocolí de muchas formas, y últimamente también veo que la gente hace la coliflor en filetes como los he hecho hoy. No es la primera vez que los hago, siempre cuando he comido sola en casas pero hoy la he hecho para comer y les ha gustado así que ha pasado la prueba supongo. 
  1. Lately I´ve been cooking cauliflower in different ways and lately also I´ve been watching people making cauliflower steaks the same way I´ve made them today. I have to confess this is not the first time I´m trying this recipe but I´ve made it when I was on my own and today I roasted it for the family and I think this is going to be a keeper.


FILETES DE COLIFLOR
Tiempo de preparación 25 minutos
Dificultad: Muy fácil

INGREDIENTES PARA 2 PERSONAS
1 coliflor
Aceite de oliva virgen (yo he usado 10 cucharadas)
1 cucharada de polvo de cebolla
1 cucharada de polvo de ajo
1 cucharada de pimentón de la Vera
1 cucharadita de orégano
Sal y pimienta para sazonar al gusto
4 cucharadas de queso parmesano rallado
Mozzarella al gusto para terminar la receta
Perejil recién picado (opcional)
Salsa de tomate (opcional)

PROCEDIMIENTO
1. Precalentar el horno a 200º. Preparar una bandeja de horno con papel de cocina. 
2. Retirar las hojas de la coliflor y dejar el tallo. Partir la coliflor por la mitad y luego en filetes de un centímetro aproximadamente. Colocarla en la fuente de horno como en la foto.
3. En un cuenco, mezclar el aceite con el polvo de ajo, cebolla y pimentón. Pintar los filetes de coliflor con esta mezcla, añadir sal y pimienta al gusto también. Añadir el queso parmesano. Hornear durante 20 minutos. 
4. Pasado este tiempo, se saca la fuente de horno, se espolvorea con la mozzarella y se vuelve a meter en el horno otros 5 minutos o hasta que el queso haya derretido. 

CAULIFLOWER STEAKS
Hands on time 25 minutes
Difficulty: Very easy

INGREDIENTS SERVES 2
1 cauliflower head
Virgin olive oil (I´ve used 10 tbsp)
1 tbsp onion powder
1 tbsp garlic powder
1 tbsp sweet paprika from La Vera
1 tsp oregano
Salt and pepper to taste
4 tbsp parmesan cheese, grated
Shredded mozzarela cheese to taste to end the recipe
Fresh parsley garnish (optional)
Tomato sauce (optional)

METHOD
1. Preheat the oven to 200ºC. Line a baking tray with parchment paper. 
2. Remove the leaves from the bottom of your cauliflower and leave the stalk in place. Slice the cauliflower in half to create the steaks. Transfer them to your baking tray as in the picture.
3. In a small bowl, mix the oil, spices, salt and pepper to taste. Brush the steaks all over with the mixture. Add the grated parmesan and bake in the oven for 20 minutes. 
4. When the time ends, remove from the oven and sprinkle with the shredded mozzarella and place back in the oven for another 5 minutes or until melted. 


¡LISTO/DONE!

TARTA DE SALMON AHUMADO Y PATATA {SMOKED SALMON AND POTATO TART}

septiembre 23, 2024
Otra manera de comer salmón ahumado, y con esta combinación de patatas, crema agria, queso crema y demás, la verdad es que queda un plato muy lucido. Ayer volvió el otoño por fin, estaba deseándolo, entre otras cosas para empezar a hornear, porque con el calor y la humedad no te apetece nada enchufarlo.
  1. This is another way to eat smoked salmon, and with this combination of boiled potatoes, créme fraîche, cream cheese, dill, chives, the truth is that the result is gorgeous. Finally Autumn is here, I was really looking forward to enjoying it, I love to bake and with the heat and humidity you really don´t feel like to turn the oven on.


TARTA DE SALMON Y PATATA
Tiempo de preparación: 1 hora
Dificultad: Muy fácil

INGREDIENTES PARA 4 PERSONAS
3 patatas medianas
Sal y pimienta para sazonar
Queso Grana Padano gratinado al gusto
1 tarrina de 300 gramos aproximadamente de crema agria
2 cucharadas grandes de queso crema
Eneldo y cebollino picado
4 lonchas de salmón ahumado
Ralladura de 1 limón
Zumo de 1/2 limón
Un chorrito de aceite de oliva
Un puñado de pepinillos en vinagre

PROCEDIMIENTO
1. Cocer las patatas en agua con sal durante 20 minutos.
2. Mientras se cuecen las patatas, mezclar la crema agria, el queso crema, la ralladura de limón y el zumo combinando bien todos los ingredientes. Picar el eneldo y el cebollino, reservar un puñado para decorar al final e incorporar el resto también a la mezcla anterior, mezclando todo bien. Reservar.
3, Cuando las patatas estén cocidas, pelarlas y machacarlas forrando una molde para horno como si fuera una base de tarta. Precalentar el horno a 200 grados. Rallar el queso grana padano encima de la patata cubriendo al gusto, sazonar con sal y pimienta y echar un chorrito de aceite de oliva y se hornea durante 20 minutos. Sacar del horno y reservar, dejar enfriar durante al menos 10 minutos. 
4. Echar la mezcla de crema agria y queso con las hierbas sobre las patatas y el queso. Se añade un poco de sal si fuera necesario, se colocan los trozos de salmón ahumado y se decora con unos pepinillos en vinagre y el resto del eneldo y cebollino picados. 

SMOKED SALMON AND POTATO TART
Hands on time: 1 hour
Difficulty: Very easy

INGREDIENTS SERVE 4
3 medium potatoes
Salt and pepper to season
Grana Padano cheese to grate to the taste
1 tin of 300gr aprox of créme fraîche
2 tbsp of cream cheese
Dill and chive to chop
4 slices of smoked salmon
The zest of 1 lemon
The juice of half lemon
Some olive oil to drizzle
A handful of gherkins

METHOD
1. Boil the potatoes in water with salt for 20 minutes.
2. In the meantime, while the potatoes are boiling, mix the créme fraîche, with the cream cheese, the lemon zest and the lemon juice, combining well all the ingredients. Finely chop the dill and the chive, and reserve a handful to garnish the tart later. Add the chopped herbs to the cheese mixture. Reserve.
3. When the potatoes are done, peel them and press them evenly into the base of a tin using a metal spoon or similar to give it a smooth surface. Preheat the oven to 200º. Grate the grana padano to your taste on the potatoes base and drizzle with a bit of olive oil. Bake for 20 minutes. When finished, reserve the tin and let it cool at least for 10 minutes.
4. Now add the filling, pouring the cheese and créme mixture, add more salt if neccesary and scatter the smoked salmon. To end, add some gherkins and garnish with the leftover chopped dill and chives.
¡LISTO!/DONE!

SETAS STROGONOFF {MIXED MUSHROOM STROGANOFF}

abril 23, 2024

Qué maravillosa alternativa vegetariana para el clásico strogonoff de ternera y además con esta salsa tan sabrosa. Si se quiere se puede usar caldo sin gluten pero yo he usado un caldo de verduras que tenía congelado. Yo he comprado una bolsita de esas con un mix de setas varias que he mezclado también con shiitakes y champiñones. 
  1. What a gorgeous vegetarian alternative to the traditional strips of beef stroganoff, with such a wonderful savory sauce. If you want, you can use gluten-free stock but I´ve used a vegetable stock I had in my freezer. I also bought a pre-mixed selection of exotic mushrooms that come in a bag which I combined with shiitake and chestnut mushrooms.


SETAS STROGONOFF
Tiempo de preparacion: Una hora entre preparación y cocinado
Dificultad: Muy fácil

INGREDIENTES PARA 4 PERSONAS
2 cucharadas de aceite de oliva virgen extra
1 cebolla, picada
400 gramos de champiñones, cortados en trozos grandes
200 gramos de setas variadas, las grandes partidas
2 dientes de ajo picados
2 cucharaditas de café de pimentón de la vera dulce
250ml de caldo de verduras ya caliente
150ml de crema espesa
Un puñado de espinacas
Sal 

PROCEDIMIENTO
1. Calentar el aceite en una sartén tipo paellera, añadir la cebolla  y cocinar lentamente a fuego medio hasta que se ablande, mas o menos 5 minutos. Aumentar el fuego y añadir los champiñones y las setas variadas y cocinarlas hasta que empiezan a coger color, añadir el ajo y las especias y cocinar durante unos minutos mas. 
2. Añadir el caldo a la mezcla anterior y llevar a ebullición. Cuando estén hirviendo, reducir el fuego y hervir durante 4-5 minutos o hasta que empieza a espesar la salsa. 
3. Añadir la crema y las espinacas. Sazonar si fuera necesario. Se puede servir con arroz o con cous-cous.

MIXED MUSHROOM STROGANOFF
Hands on time: Around an hour. 30 minutes for the preparation and 30 minutes for the cooking time.
Difficulty: Very easy

INGREDIENTS SERVES 4
2tbsp virgin olive oil
1 large onion chopped
400g button or chestnut mushrooms thickly cut
200g mixed or exotic mushrooms, sliced if large
2 garlic cloves, crushed
1tsp sweet smoked paprika
250ml hot vegetable stock
150ml whole cream
A handful of spinach leaves
1tbsp chopped fresh tarragon and if you don´t like it use parsley

METHOD
1. In a large frying pan, heat the olive oil over medium heat and cook the onion until soft, about 5 min Increase the heat to high, add the mushrooms and cook until browned, then add the garlic and spices and cook for a further min. 
2. Pour over the stock and bring to the boil, then reduce the heat and simmer for 4-5 min until thickened. 
2. Add the cream and the spinach leaves. Season if neccesary. 

¡LISTO!/DONE!

PIMIENTOS RELLENOS SALUDABLES {HEALTHY STUFFED PEPPERS}

septiembre 11, 2023
La verdad es que es una receta muy sana y encima de aprovechamiento. Se puede rellenar con cualquier cosa que tengas en el frigorífico, yo he usado un calabacín, unos huevos, unos champiñones y queso y la verdad es que bien sazonada la receta es buenísima y encima muy muy sano todo.
  1. The truth is that this recipe is healthy and made with leftovers. You can use anything you have in the fridge, I´ve made it with one courgette, some eggs, some mushrooms and cheese and if you season it well the recipe is gorgeous and very very healthy.

PIMIENTOS RELLENOS SALUDABLES
Tiempo de preparación: Lo que tardas en picar y rellenar + 25 minutos de horno
Dificultad: Muy fácil

INGREDIENTES PARA 6 PIMIENTOS
1 calabacín, pelado y cortado en cubitos
6 pimientos de colores amarillo, rojo y verde
4 huevos
1 paquete de champiñones
Sal y pimienta y cualquier otro sazonamiento que se desee
Queso mozzarella o un queso que funda bien

PROCEDIMIENTO
1. Precalentar el horno a 180º durante 10 minutos. Quitar una tapita a los pimientos como en la foto y vaciar de pepitas. Reservar en una fuente.
2. Batir los huevos bien. Picar el calabacín y los champiñones y mezclarlos con el huevo bien. Todo en crudo. Sazonarlo todo muy bien, que esté sabroso.
3. Añadir el queso rallado y rellenar los pimientos. Hornearlos durante 25 minutos.

HEALTHY STUFFED PEPPERS
Hands on time: The time spent chopping all the veggies plus 25 minutes in the oven
Difficulty: Very easy

INGREDIENTS FOR 6 PEPPERS
1 courgette, peeled and cut in cubes
6 bell peppers if they have some colour the better
4 eggs, beaten
1 box of chesnut mushrooms
Salt and pepper to season well and any other spice of your choice
Mozzarella cheese or another one that melts well

METHOD
1. Pre heat the oven to 180º for 10 minutes. Remove a cap from the peppers like in the pictures and remove de seeds well. Reserve on a baking tray.
2. Beat the eggs well. Chop the courgette and the mushrooms and mix them well with the egg. Season everything well.
3. Add the cheese and combine all the ingredients together. Stuff the peppers and bake them in the oven for 25 minutes.


¡LISTO! / DONE!

TARTA DE CALABACÍN Y PESTO {COURGETTE AND PESTO TART}

junio 26, 2023
Que si que si, que ya ha llegado el verano y aunque aquí ha llegado de una manera mas o menos normal, el resto del país está sufriendo una verdadera ola de calor, por eso le decimos aquí "los veranos del norte". Aún así, los menús cambian, el horno no se enciende tan a menudo y salimos mas. Esta tarta es buenísima, porque te la puedes comer fría o caliente, sirve para comerla con una ensalada o para llevarla a cualquier sitio porque se corta fácil.
  1. Yes obviously, summer is here already and though season is quite mild in my area and for us, more or less normal, the rest of the country is going through a heat wave, that´s why we always say "summers of the north". Menus change, the ovens aren´t swiched on so often and we are out more times than inside our homes. This tart is gorgeous for many reasons. You can eat it cold or warm, you can serve it with a salad as a sidedish or you can take it anywhere because it´s very easily cut.


TARTA DE CALABACÍN Y PESTO
Tiempo de preparación unos 30 minutos - Horno 30 minutos
Dificultad - Muy fácil

INGREDIENTES PARA UNA TARTA COMO PARA 4/6
Un paquete de pasta brisa o como yo hacerla casera
2 huevos grandes
1 yema
150ml de nata espesa
3 cucharadas grandes de salsa pesto, yo he usado comprada
1 calabacín grande
Hojas de albahaca para decorar

PROCEDIMIENTO
1. Precalentar el horno a 200º. Forrar el molde para tartas, yo he utilizado uno rectangular con el fondo desmontable. Forrarlo con la pasta brisa, pinchar un poco la masa y ponerla en el frigorífico durante 20 minutos. 
2. Colocar papel de horno encima de la masa y llenarlo con unas alubias. Cocinarlo en el horno durante 15 minutos o hasta que veamos que los bordes estén un poco dorados.
3. En un bol, se mezclan los huevos, la yema extra, la nata y las cucharadas de pesto. 
4. Pelar el calabacín en lonchas finas y parar cuando llegas a la parte de las semillas. Se colocan tres o cuatro tiras en la base de la tarta, se echa la mezcla y se colocan unos rollitos de tiras de calabacín como en las fotos. Cuando se hace la tarta en el horno se mueven un poco pero eso no importa. Yo la he tenido en el horno unos 30 minutos pero dependerá de cada horno. Dejar enfriar un poco antes de servir. 
5. Si no se tiene un molde rectangular, se puede utilizar uno redondo, con las mismas cantidades en todo menos en la nata que agregaremos 100ml mas además de lo que dice en la receta y añadiremos un huevo mas.
 
COURGETTE AND PESTO TART
Hands on time 30min. plus oven time around 30min
Difficulty: Very easy

INGREDIENTS SERVES 4-6
Ready made shortcrust pastry or like me, homemade. 
2 large eggs
1 egg yolk
150ml double cream
3tbsp ready made basil pesto
1 big courgette
Fresh basil leaves to garnish, optional

METHOD
1. Preheat the oven to 200ºC. Roll out pastry to line the base and sides of a rectangular loose-bottom tart tin. Prick base with a fork and chill in the fridge for 20min.
2. Line pastry case with baking parchment and fill with baking beans. Cook in the oven for 15 minutes or until sides are golden. Remove from oven, lift out baking beans and proceed with the next step.
3. In a large bowl, whisk eggs, extra yolk, cream and pesto. 
4. Peel the courgette into ribbons, stopping when you reach the seedy middle, discard this. Then lay about 5 ribbons blat on the pastry and pour egg mixture into the base of the tart tin. Gently set courgette spirals into the mixture (like in the picture), spacing slightly apart. Bake in the oven for about 30 minutes, but check because this depends on each oven. Spirals move a bit when baking, but it´s not important. Leave to cool and serve at room temperature. 
5. This tart can be made in a round fluted tart tin. Follow instructions above adding an extra 100ml cream 1 more egg to the custard filling.

¡LISTO! / DONE!

COL ROJA O LOMBARDA CON PERAS {PEAR RED CABBAGE}

mayo 15, 2023
Alguno pensará que esta verdura es mas típica de navidad que de primavera, pero el caso es que como me gusta mucho la berza verde, y aun no había hecho todavía la lombarda, las vi el otro día y hala aquí la traigo, además hemos vuelto un poco a invierno aunque ya estemos en Mayo. Esta receta es de Jamie Oliver, y el la hace con chorizo además de la pera, pero bueno, yo chorizo no le quería poner para que fuera un plato mas saludable y estaba buenísima igualmente, me imagino que a los que les guste el chorizo como a mí, se iban a volver locos como dice el. La combinación de estos sabores dulces y amargos impactan bastante. 
  1. Somebody will think that this vegetable is more typical at Christmas than it is now, but the thing is that I love cabbage, the green one, I had never eaten red cabbage before, so as I saw them in the market the other day and somehow, we are back to some sort of winter, even in May, that´s the reason I´m posting it today. This is a recipe from Jamie Oliver and he makes this recipe with chorizo besides the pear, but well I didn´t want to add chorizo to this recipe to have a more healthy dish and believe me it was gorgeous. The ones who love chorizo as much as I do will go nuts for this recipe, as Jamie says. The sweet and sour combination impact when you eat it.


COL ROJA O LOMBARDA CON PERAS
Tiempo de preparación: 30 minutos
Dificultad: No muy difícil

INGREDIENTES PARA 4 PERSONAS
1 berza roja o lombarda
1 cebolla roja
2 peras, yo he usado conferencia y naturales, se pueden usar de lata en su jugo
2 cucharadas de aceite de oliva
2 cucharaditas de semillas de eneldo
Un chorro de vinagre de vino tinto, aprox. 3 cucharadas soperas
Sal

PROCEDIMIENTO
1. Si se usa chorizo, se cocinarán el resto de las verduras con los jugos del chorizo, si no, añadir un poco de aceite de oliva. En una cazuela poner un poco de aceite, añadir las semillas de eneldo. Pelar y picar finamente la cebolla, añadirla a la cazuela y cocinarla durante unos minutos o hasta que esté blandita.
2. Eliminar las hojas exteriores de la lombarda y quitar el tallo. Cortarla en porciones y lonchearlos en lonchas gorditas. Añadir a la cazuela con un chorro de vinagre, sazonar y tapar. Cocinar durante 10 minutos, removiendo frecuentemente. 
3. Pelar las peras si son naturales como en mi caso, o si no, añadir las peras en lata con un poco de su jugo y continuar con la cocción otros 10 minutos mas, o hasta que la lombarda esté tierna. 

PEAR RED CABBAGE
Hands on time: 30 minutes
Difficulty: Not too tricky

INGREDIENTS SERVES 4
1 red cabbage
1 red onion
2tsp of fennel seeds
2 pears, fresh ones or tinned ones in natural juice
3tbsp red wine vinegar
2tbsp virgin olive oil
Salt to season

METHOD
1. If chorizo is finally used, the rest of the vegetables will be cooked with the chorizo juices, if not, add some olive oil to a pan, add the fennel seeds. Peel and finely slice the red onion, add to the pan and cook for a few minutes or until softened and smelling amazing.
2. Click away any tatty outer leaves from the red cabbage, trim the base, then cut into wedges and roughly slice. Add to the pan with the red wine vinegar, add a pinch of salt. Cook with the lid ajar on a low heat for 10 minutes, stirring frequently. 
3. Peel the pears if natural as in my case, or if not, add the tinned pears with some of the juice, and continue cooking for a further 10 minutes or until the cabbage is tender.

¡LISTO! / DONE!

GAZPACHO DE TOMATES Y FRESAS {STRAWBERRIES AND TOMATOES GAZPACHO}

abril 17, 2023
Acabo de llegar del sur, un viaje rápido y allí ya estaban casi en verano, mucho calor y ya hemos tomado unos cuantos de estos. Esta receta no tiene ningún secreto, hacemos gazpacho en la mayoría de las casas sobre todo en verano, pero estos días de calor de las semanas pasadas hice este y estaba tan bueno que me han pedido que lo escriba aquí. Es una receta que viene en el libro de las recetas adelgazantes de David de Jorge, así que sin riesgos, otra receta saludable y light. 
  1. I just came from the south, a quick trip and temperatures were high there, it looked as if we were in summer already, quite hot and we´ve drunk some of these who are typical there. This recipe has no secrets at all, we make gazpacho in most of our homes specially in the summer, but the hot days we had for the past weeks I made this one and it was so good that everybody asked me to post it in here. This is a recipe that is in the book of slimming recipes of David de Jorge.

GAZPACHO DE TOMATES Y FRESAS
Tiempo de preparación 8 horas en el frigo toda la noche + 10 minutos
Dificultad: Muy fácil

INGREDIENTES PARA 1 LITRO DE GAZPACHO
600 gramos de tomates
400 gramos de fresas
50 gramos de pimiento verde
50 gramos de pimiento rojo
1 pepino
1 diente de ajo
150ml de aceite de oliva virgen extra
1 vaso de agua
40 gramos de pan 
30 ml de vinagre de jerez
Sal y pimienta para sazonar
Unos cubitos de mozzarela para decorar o cebollino fresco

PROCEDIMIENTO
1, Lavar bien la verdura, pelar el pepino y quitarle las semillas si las tiene.
2. Cortar en trozos los tomates y los pimientos y colocarlos la víspera en una cazuela grande con el resto de los ingredientes excepto las fresas. Cubrirlo con plástico y dejarlo en el frigo toda la noche. 
3. Al día siguiente, añadir las fresas y batirlo todo en una batidora de vaso. Sazonar bien y pasarlo por el chino.
4. En el momento de servir, se sirve en cuencos con la guarnición que se elija.

STRAWBERRIES AND TOMATOES GAZPACHO
Hands on time: 8 hours in the fridge all over night + 10 minutes
Difficulty: Very easy
INGREDIENTS FOR 1 LITRE OF GAZPACHO
600gr tomatoes
400gr strawberries
50gr green pepper
50gr red pepper
1 cucumber
1 clove of garlic
150ml extra virgin olive oil
1 glass of water
40gr bread
30ml sherry vinegar
Salt and pepper to season well
Some cubes of mozzarella to garnish or some fresh chive

METHOD
1, Clean all the veggies thoroughly, peel and deseed the cucumber. 
2. Cut all the vegetables, tomatoes and peppers and put them in a big bowl inside the fridge overnight with all the rest of the ingredients except for the strawberries. Cover the bowl with cling film and leave it in the fridge.
3. The next morning, process all the ingredients in a food processor and pass the gazpacho through a sieve. Season well 
4. Serve in small bowls with the garnish, the small cubes of mozzarella or simply some garnish.

¡LISTO! /DONE!

POLLO AL LIMÓN CON PATATAS Y ORÉGANO {CHICKEN LEMON AND POTATOES WITH OREGANO}

marzo 27, 2023
Qué receta tan rica, bueno si te gusta el limón claro. Yo no suelo preparar pollo con limón, la verdad es que esta ha sido una receta que automáticamente he asociado a veranos calurosos, con ese aroma a cítricos dentro de mi horno y también de mi frigorífico, pero a mi me gusta mucho el limón y al final he disfrutado de esta receta. Lo mejor es hacerla con orégano fresco pero ahora es imposible así que he usado del seco que tampoco está tan mal.
  1. What a gorgeous recipe, ok if you like lemon of course. I normally don´t make chicken with lemon, the truth is that these are flavours I will associate with hot summers, with that citric aroma inside my oven and my fridge, but I love lemons and I´ve really enjoyed this recipe. The best thing is to make it with fresh oregano but now it´s not in season so I´ve used dried one instead and it wasn´t so bad.

POLLO AL LIMÓN CON PATATAS Y ORÉGANO
Tiempo de preparación 1 hora y media y poner el pollo anterior el día anterior
Dificultad: Fácil

INGREDIENTES PARA 6 PERSONAS
6 Muslos de pollo con sus contramuslos con la piel
Un puñado de orégano fresco o seco
2 limones grandes limpios de cera
1/2 kilo de patatas pequeñas, he usado unas que he visto en el super para hacer en el micro
8 cucharadas de aceite de oliva 
Una ensalada de acompañamiento si se quiere

PROCEDIMIENTO
1. Poner las piezas de pollo en un cuenco grande, sazonar muy bien con sal marina y echar el orégano. Cortar los limones en trozos pequeños con la piel y añadirlos al cuenco con el pollo. Si se tiene tiempo, lo mejor es hacer esto la noche anterior y dejarlo en el frigorífico a que se mezclen bien todos los ingredientes, lo que añadirá mas sabor.
2. He hecho las patatas en el micro ondas porque encontré esta bolsa en el supermercado y me dio curiosidad, si no, en este punto se cuecen las patatas sin pelar en agua con sal durante 10 minutos. Se cuelan, se pasan por agua fría hasta que estén lo suficientemente frías para poderlas tocar y se parten por la mitad, (por la mitad o en cuartos).
3. Calentar el horno a 180º. Se pone una fuente con un poco de aceite de oliva, se colocan las piezas de pollo, las patatas y los trozos de limón en una capa sin que se queden unos trozos encima de otros. Se echa el resto del aceite de oliva por encima.
4. Cocinar el pollo durante una hora y media o hasta que la piel del pollo este dorada y crujiente. Cuando termina, se pasan los trozos de pollo, patatas y limones a una fuente que esté templada, y en la fuente donde se han asado los muslos, se echa un poco de agua para desglasar y se echa esta salsa sobre la carne. Servir con una ensalada simple.

CHICKEN, LEMON AND POTATOES WITH OREGANO
Hands on time: 1h and a half plus the time in the fridge since the day before
Difficulty: Easy

INGREDIENTS SERVES 6
6 leg and thigh pieces of skin-on chicken
Small bunch of fresh oregano or dried one
2 large unwaxed lemons
Half kilo of small potatoes, I´ve used ones I found in the supermarket to be cooked in the microwave
8tbsp olive oil
A green salad to serve if wanted

METHOD
1. Put the chicken pieces in a bowl and season well with sea salt and the oregano. Cut the lemons in 8 chunks, leaving the skin on, and add to the chicken. If you have time, you can do this the day or night before and leave it in the fridge to marinate, which will add to the flavour.
2. I´ve cooked my potatoes in the microwave following the instructions in the bag, otherwise, put the potatoes, whole and unpeeled in a pan of well-salted water and bring to the boil. Boil for 10 minutes, or until just tender on the outside and uncooked in the middle. Drain and run under cold water until cool enough to handle, then cut into pieces (halves or quarters).
3. Heat the oven to 180ºC. Pour some olive oil into the bottom of a large roasting tray and lay the chicken, lemon pieces and potatoes in one layer with no overlapping pieces. Drizzle the remaining olive oil over the top.
4. Cook for 1 and a half hours, until the chicken skin looks golden and crisp. Use a metal spatula to lift the potatoes and chicken onto a warmed servind dish, then deglaze the roasting tray with a splash of wateer and pout this over the meat. Serve with a simple green salad.

¡LISTO! / DONE!

PIMIENTOS VERDES RELLENOS {STUFFED GREEN PEPPERS}

marzo 13, 2023
Yo nunca había rellenado pimientos verdes hasta que se los vi a mi suegra, estaban deliciosos, eso sí, iban rellenos de bechamel, con jamón y huevo duro picados así que parecía que te estabas comiendo una croqueta gigante, porque yo la bechamel puedo comérmela con cualquier cosa la verdad y si además está dentro de un pimiento pues también bien, porque siempre digo que podría sobrevivir con pimientos y huevos y si ya llevan esta salsa maravillosa pues mejor. 
  1. I had never stuffed green peppers until I saw my mother in law making them in her house many years ago, ok those were stuffed with bechamel sauce, jamón and hardboiled egg finely chopped and it was gorgeous, it was as if you were eating a giant croquette, because the truth is that I can eat bechamel sauce with anything and if it goes inside a pepper it´s also fine. I always say that I could survive on eggs and peppers and well if bechamel sauce is around much better.
Los de hoy no se parecen en nada a aquellos que me hizo mi suegra, pero la ventaja es que te los puedes comer sin ningún remordimiento porque son mas sanos y mas ligeros.
  1. The ones I´m posting today have nothing to do with those my mother in law made ages ago, but the good thing about these is that you can eat them with no regrets because they are much healthier and obviously lighter.
PIMIENTOS VERDES RELLENOS
Tiempo de preparación 20 minutos + tiempo de horno 25 minutos
Dificultad: Muy muy fácil

INGREDIENTES PARA 3 PERSONAS
6 pimientos verdes
2 latas de bonito en aceite de oliva
4 huevos duros
500 gramos de salsa de tomate, la mía hecha en casa pero se puede usar comprada

PROCEDIMIENTO
1. Precalentar el horno a 170ºC durante 10 minutos. Yo suelo usar un pelador de tomate para pelar los pimientos lo más que pueda, quedan mejor sin piel. Se les quitan las pepitas y se abre la parte de arriba que se reserva para taparlos después.
2. Picar el huevo y mezclar bien todos los ingredientes en un cuenco.
3. Cuando está preparado el relleno, rellenar los pimientos lo máximo que se pueda.
4. Hornear durante 25 minutos. Servir. Se puede servir con salsa de tomate o mayonesa.

STUFFED GREEN PEPPERS
Hands on time: 20 minutes plus another 25 minutes in the oven
Difficulty: Very very easy

INGREDIENTS SERVE 3
6 green peppers
2 cans of a good bonito in virgin olive oil
4 hardboiled eggs
500grs of tomato sauce, mine was homemade but you can buy any at the supermarket

METHOD
1. Preheat the oven to 170ºC for 10 minutes. I normally peel the peppers with a tomato peeler, I think they come out much better. Deseed them and leave the top to cover them afterwards.
2. Finely chop the hardboiled eggs and combine all the ingredients in a bowl.
3. When the stuffing is made, introduce it with a spoon and the maximun it can admit.
4. Bake for 25 minutes. Serve. You can add some tomato sauce or mayonnaise.

¡LISTO! / DONE!

POLLO EN TIRAS CON PARMESANO {CHICKEN STRIPS WITH PARMESAN}

febrero 06, 2023
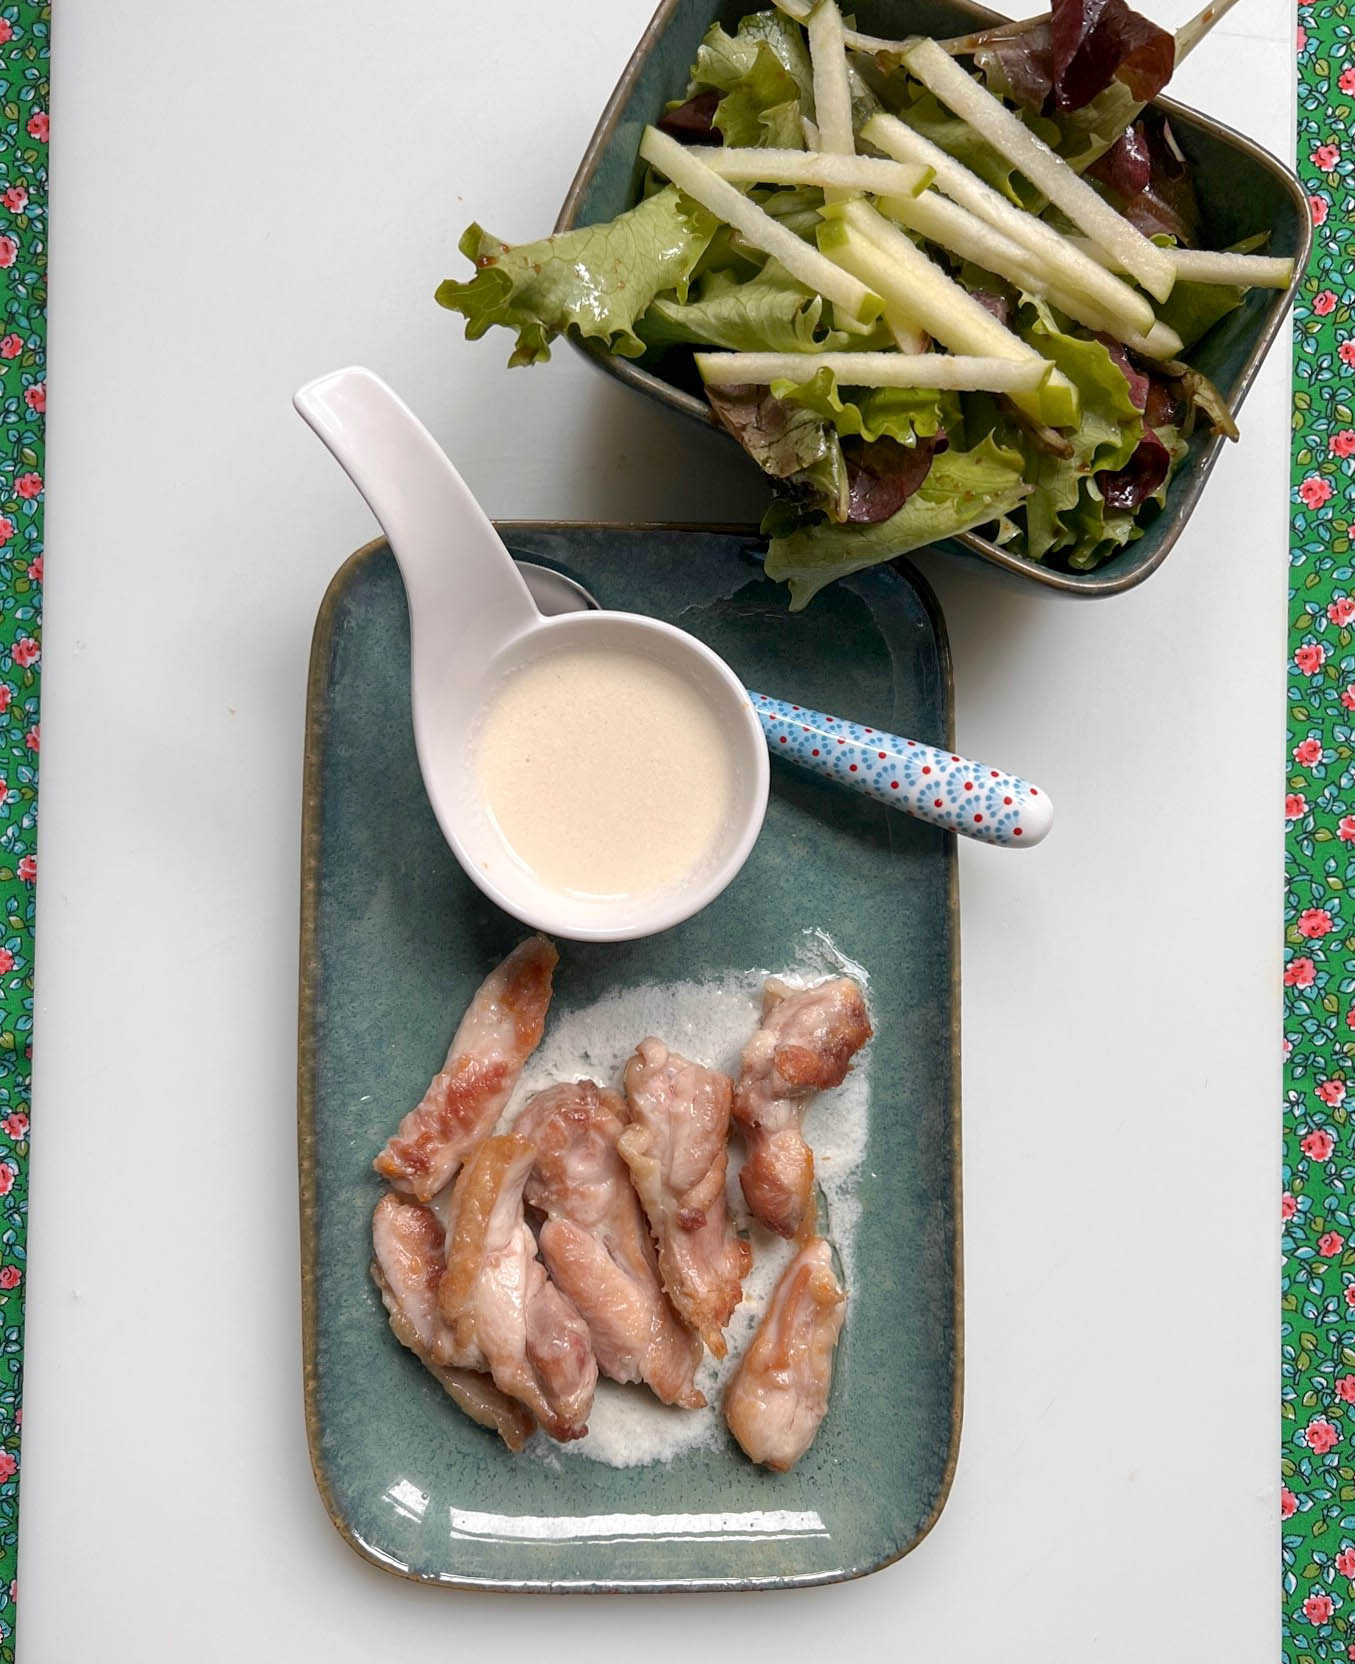
No es la primera vez que pruebo una receta cuando me llama la atención, de nuevo la fuente M. Berasategui, guardada por cierto desde el 2013, ¡qué desastre! cuanto tiempo sin hacer una receta.
Si el carnicero puede deshuesaros los contramuslos mejor. Reservar los muslitos para otra preparación.  Nos ha encantado la receta.
  1. This is not the first time that I try a recipe when it catches my attention, once more my source is Martín Berasategui, by the way I´ve been keeping this since 2013, oh my!, time flies, it´s been a long time without making it. If your butcher can debone the chicken thighs, much better. Keep the drum sticks for another preparation.  We really liked the recipe.


POLLO EN TIRAS CON PARMESANO
Tiempo de preparacion 1 hora
Dificultad: Fácil

INGREDIENTES PARA 4 PERSONAS
500 gramos de contramuslos de pollo deshuesado
1 diente de ajo, pelado 
100 gramos de leche entera
100 gramos de nata
100 gramos de caldo de ave
200 gramos de Parmesano
Un puñado de brotes de lechugas
4 cucharadas de aceite de oliva virgen extra
1 cucharada de vinagre de Jerez
1 manzana Granny Smith
Sal y pimienta

PROCEDIMIENTO
1. Se cortan los contramuslos en tiras de 1 centímetro aproximadamente. Se pela el ajo, se le retira el germen y se filetea no muy fino para que no se queme.
2. Haremos la emulsión de Parmesano. En un cazo, se echa la leche, la nata y el caldo. Se lleva a ebullición. Mientras tanto, rallamos el queso con el rallador mas fino que tengamos. Se retira los líquidos del fuego y se echa el queso, la mezcla tiene que estar bien caliente pero no hirviendo. No se debe remover mucho para que el queso no se haga filamentos. Se cubre con papel film y se deja reposar 30 minutos.
3. Pasado este tiempo, se tritura y se pasa por un colador.
4. Se corta la manzana en bastoncitos. En una sartén, se echan unas gotas de aceite de oliva y se fríen las tiras de pollo con los ajos. 
5. Cuando llegue el momento de servir, en la base de un plato se coloca un poco de la salsa de Parmesano, encima de esta, los bastones de pollo se sirve también la ensalada bien aliñada y los bastones de manzana encima. Se puede servir el resto de la salsa en un cuenco por si alguien quiere mas. 


CHICKEN STRIPS WITH PARMESAN
Hands on time: 1 hour
Difficulty: Easy

INGREDIENTS SERVES 4
500gr deboned chicken thighs
1 clove of garlic, peeled
100gr milk
100gr cream
100gr chicken broth
200gr Parmesan
A handful of baby lettuces, different kind
4tbsp virgin olive oil
1tbsp Sherry vinegar
1 apple Granny Smith
Salt and pepper to season

METHOD
1. The thighs are cut into strips of approximately 1 centimeter. Peel the garlic, remove the germ and don´t slice it very finely so that it does not burn.
2. We will make the Parmesan sauce now.  In a saucepan, add the milk, cream and broth. Bring it to the boil. Meanwhile, grate the cheese with the finest grater we have. Remove the liquids from the heat and pour the cheese, the mixture has to be very hot but not boiling. It should not be stirred much so that the cheese does not become filaments. Cover the saucepan with plastic wrap and left to infuse for 30 minutes.
3. After this time, process it and passed it through a strainer.
4. Cut the apple into sticks. In a frying pan, add a few drops of olive oil and fry the chicken strips with the garlic.
5. When the time to serve it has come, place a little of the Parmesan sauce at the base of the plate, on top of this, the fried chicken sticks, serve the salad in a side bowl with the apple sticks on top.  You can serve the rest of the sauce in a bowl in case someone wants more.


¡LISTO! DONE!
 
Copyright © decocinasytacones. Diseñado con por Las Cosas de Maite