Mostrando entradas con la etiqueta Dulce {Sweet}. Mostrar todas las entradas

PASTEL DE FRESAS {STRAWBERRY CAKE}

agosto 02, 2026
Estamos en temporada de una de mis frutas favoritas. Las fresas aportan a este pastel que por cierto es super fácil de hacer humedad y jugosidad además de que es muy tierno. Va lleno de ralladura de limón así que os podéis imaginar que su sabor es increíble y estoy completamente segura que no va a ser la única vez que lo vaya a hacer. Las fresas aportan tanto jugo a este bizcocho que al día siguiente simplemente está perfecto. Probarlo, es delicioso y si encima os digo que en 20 minutos lo tenéis todo listo, y que el resto lo hace el horno, estoy segura que os va a gustar mas. Es un pastel simple, no lleva una decoración especial y no tiene un trabajo extra especial. No usar fresas congeladas, aportarían un exceso de líquido a la masa y eso no nos interesa. Fuente The loopy whisk.
  1. We are in the strawberry season, which is one of my favorite fruits. Strawberries give moist to this cake which is also tender and soft. It´s packed with a lot of lemon zest so as you can imagine its flavour is incredible and I´m completely sure this won´t be the only time I´m making it. As it is so moist, the day after is simply perfect to enjoy. Try it, it´s gorgeous and if I tell you that it can be made in about 20 minutes and that the rest of the time is completed in the oven I´m sure you´re going to like it better. It´s a really simple cake. There´s no decorating, no fuss and no frills. Use fresh (not frozen) strawberries, they would release too much moisture to the batter and we don´t want that. Source TheLoopywhisk.


PASTEL DE FRESAS
Tiempo de preparación 20 minutos + tiempo de horno 1 hora
Dificultad: Muy fácil

INGREDIENTES PARA UNA TARTA PARA 8 PERSONAS
500 gramos de fresas naturales
200 gramos de azúcar
Ralladura de dos limones
115 gramos de mantequilla derretida y no muy caliente
40 gramos de aceite de girasol
175 gramos de buttermilk (la haremos con una taza de leche entera y una cucharada de zumo de limón)
3 huevos grandes a temperatura ambiente
1/2 cucharadita de extracto de vainilla
210 gramos de harina
75 gramos de harina de almendra
1 1/2 cucharadita de levadura en polvo
1/2 cucharadita de bicarbonato
1/2 cucharadita de sal
1/2 cucharadita de goma xantana
Azúcar glas para decorar cuando el pastel esté frío.

PROCEDIMIENTO
1. Precalentar el horno a 180ºC durante 10 minutos y colocar la bandeja en el centro del horno.  Untar con mantequilla un molde de unos 23 cm. con el fondo desmoldable  y cubrirlo con papel encerado para horno.
2. Preparar las fresas. Cortar 1/3 de las fresas en trozos pequeños y el resto solo por la mitad. Reservar.
3. Mezclar el azúcar con la ralladura de limón en un cuenco y con los dedos frotar ambos para que el azúcar se impregne de los aceites esenciales de la cáscara de los limones y así el pastel estará mas limonero y mas aromático. 
4. Mezclamos ahora los ingredientes húmedos. Añadir la mantequilla derretida, el aceite, el buttermilk, los huevos y la vainilla y mezclarlo bien hasta que estén todos los ingredientes combinados.
5. En otro cuenco, ahora mezclamos los ingredientes secos, la harina, la harina de almendra, el bicarbonato, la levadura, la goma xantana y la sal y añadirlos a los ingredientes húmedos.  Mezclar todo bien.
6. Se echa la mitad de la masa en el molde y se alisa bien. Se echan las fresas partidas en trozos por toda la masa . Se cubren con el resto de la masa teniendo la seguridad de que se cubren todas las fresas partidas bien. Alisar. 
7. Ya para terminar, se colocan las fresas partidas por la mitad encima de la masa poniéndolas lo mas juntas posibles, se pueden poner unas hacia arriba y otras hacia abajo para que visualmente resulte mas bonito.
8. Hornear durante 1 hora o hasta que insertando una aguja salga limpia. Si se empieza a dorar mucho por las esquinas cubrirlo con un poco de papel de aluminio y continuar horneando hasta que se acabe. Dejar enfriar el pastel en el molde durante 15 minutos antes de pasarlo a una rejilla para que se enfríe del todo.

STRAWBERRY CAKE
Hands on time: 20 minutes + 1 hour in the oven
Difficulty: Very easy

INGREDIENTS FOR THE CAKE SERVES 8
500g fresh strawberries
200g granulated sugar
Zest of 2 lemons 
115g unsalted butter, melted and cooled until warm
40g sunflower oil
175g buttermilk, room temperature
3 large eggs, room temperature
1/2 tsp vanilla extract
210g flour
75g almond flour
1 1/2 tsp baking powder
1/2 tsp baking soda
1/2 tsp xanthan gum
1/2 tsp salt
Icing sugar for dusting the baked cake

METHOD
1. Pre-heat the oven to 180ºC. Adjust the oven rack to the middle position. Lightly butter a 23cm springform pan and line it with parchment paper. 
2. Prepare the strawberries. Chop about 1/3 of the strawberries into small pieces. Slice the remaining strawberries in half. Set aside until needed.
3. Add the sugar and lemon zest to a large bowl, and use your fingertips to rub the zest into the sugar. This heps to release more essential oils from the zest, it will make your cake even more lemony and aromatic.
4. Now we are going to mix the wet ingredients. Add the melted butter, oil,, buttermilk, eggs and vanilla and whisk well until combined.
5. In a separate bowl, now we will mix the dry ingredients. Whisk together the flour, the almond flour, baking powder, baking soda, xanthan gum and salt, and add them to the wet ingredients. Whisk well all the ingredients together to get a smooth cake batter.
6. Transfer about half of the batter into the lined springform pan and smooth it out into an even layer. Sprinkle the chopped strawberries evenly over the batter. Dollop the remaining batter over the chopped strawberries, making sure to cover them as much as possible. Smooth the top.
7. To finish, arrange thehalved strawberries on top of the batter and make sure to pack them as close together as possible. You can arrange them cut side up or down, either way works. 
8. Bake at 180ºC for about 1 hour or until the cake is well-risen, golden on top or until an inserted toothpick comes out clean. If the cake starts browning too quickly, cover it with a sheet of aluminium foil to continue baking until done. Allow the cake to cool in the pan for about 15 minutes before removing it from it onto a wire rack to cool completely.

¡LISTO! / DONE!

UNOS BROWNIES DE LIMON {LEMON BROWNIES}

noviembre 26, 2023
Esta receta es parte de una celebración de cumpleaños, para una persona a quien le gustan todas las cosas que lleven limón. No estaba previsto incluirla en el blog y por eso no hay fotos bonitas, pero como siempre hago fotos a veces por si acaso, y este pastelito es tan bueno que he decidido ponerlo porque esta vez no quedó absolutamente nada en la bandeja. 
  1. This recipe is part of a menu I made for a birthday celebration, for somebody who is a lemon tarts freak. I wasn´t going to post this recipe in here and there are no proper pictures to show but as I take pictures every now and then just in case I use them after, and this brownie was sooo good, I finally decided to share it, as you can imagine there was no leftovers.
Además, no puede ser mas fácil porque se hace todo a mano y no hay que batir mucho. El glaseado de crema de queso es buenísimo también. Muy buena recomendación. La fuente es de Loopy Whisk y un par de fotos suyas también. Las velas con la llama de color han sido un plus al postre.
  1. Besides, it couldn´t be easier to make, everything is made by hand, no food processors, nothing and not too much shaking. The cheese icing is also gorgeous. This is a very good recommendation. Source comes from The Loopy Whisk and a couple of pictures too. The candles with the colored flames were a plus detail to the dessert.

BROWNIES DE LIMÓN
Tiempo de preparación: 30 minutos. Tiempo de horno: 20 minutos - TOTAL 50 minutos
Dificultad: Fácil

INGREDIENTES PARA UN MOLDE CUADRADO DE 23 CM.
250 gramos de azúcar
La ralladura de 2 limones (yo uso orgánicos y sin ceras)
170 gramos de mantequilla sin sal, derretida y a temperatura ambiente
2 huevos grandes, a temperatura ambiente
2 yemas de huevo, a temperatura ambiente
Media cucharadita de extracto de vainilla
3 cucharadas grandes de zumo de limón recién exprimido
150 gramos de harina para celíacos o harina normal
Media cucharadita de goma Xantana si la harina sin gluten no la lleva. 
Media cucharadita de sal

INGREDIENTES PARA EL GLASEADO DE QUESO CREMA
120 gramos de azúcar glas, aireada
55 gramos de queso crema tipo Philadelphia
2 cucharadas de zumo de limón recién exprimido
La ralladura de 1/2 limón
Media cucharada de extracto de vainilla

PROCEDIMIENTO
1. Ajustar la bandeja de horno a la posición del medio, precalentarlo a 180º y forrar el molde de 23 centímetros cuadrado con papel de horno.
2. Añadir el azúcar y la cáscara de limón en un cuenco y frotar ambos con los dedos para que el azúcar coja todo el aroma del limón. Añadir después la mantequilla derretida, huevos, yemas, vainilla y remover con una cuchara de madera o varilla hasta que está todo bien mezclado, pero no sobre mezclar todo porque no queremos que haya demasiado aire dentro de la mezcla. Añadir el zumo de limón y mezclar bien.
3. En otro cuenco, mezclar la harina y la goma xantana y la sal. 
4. Pasar los ingredientes secos al cuenco de los húmedos y mezclar todo bien. Cuando estén bien combinados todos los ingredientes, pasar la mezcla al molde y alisar bien la superficie.
5. Hornearlo durante 20 minutos. Dejarlos enfriar completamente antes de desmoldar y de poner encima el glaseado.

PROCEDIMIENTO PARA EL GLASEADO DE CREMA DE QUESO Y LIMÓN
1. En un cuenco, combinar el queso crema con el limón y el azúcar glas. Mezclar bien hasta que se obtenga una crema ligera sin grumos.
2. Echar por encima del brownie el glaseado cuando esté completamente frío y usar una espátula para alisarla.
3. Esperar a que se asiente antes de partirlo en trozos cuadrados. El glaseado no se endurece pero se mantiene bien. Debería de reposar durante al menos dos horas antes de comer.

LEMON BROWNIES
Hands on time: 30 minutes plus 20 more in the oven. Total time 50 minutes
Difficulty: Easy

INGREDIENTS FOR A 23CM BAKING PAN
250g caster or granulated sugar
Zest of 2 lemons, I use organic and unwaxed ones
170g unsalted butter, melted and cooled until warm
2 large eggs, room temperature
2 large yolks, room temperature
1/2 spoon vanilla extract
3tbsp lemon juice, freshly squeezed
150g plain gluten free flour or white flour
1/2 tsp xanthan gum if your gluten free flour doesn´t contain it
1/4 tsp salt

INGREDIENTS FOR THE CREAM CHEESE ICING
120g powdered icing sugar, sifted
55g full fat cream cheese, room temperature
10g lemon juice, freshly squeezed
Zest of 1/2 lemon
1/2 tsp vanilla extract

METHOD FOR THE BROWNIE
1. Adjust the oven rack to the middle position, pre-heat the oven to 180º and line a 23cm square baking pan with baking paper.
2. Add the sugar and lemon zest to a large bowl, and use your fingertips to rub the zest into the sugar. This will help to release more essential oils from the zest and will make your lemon brownies even more lemony and aromatic. Add the melted butter, eggs, egg yolks and vanilla and whisk until well combined and smooth. Dont aerate the mixture, we don´t want to much air into the batter. Add the lemon juice and whisk well to combine.
3. Add the dry ingredients to the wet and whisk well until you get a smooth, fairly runny batter with no flour clumps.
4. Transfer the batter into the lined baking pan and smooth out the top.
5. Bake at 180ºC for 20 minutes or until they´re golden on top. Allow the brownies to cool completely to room temperature in the baking pan before you spread on the lemon cream cheese icing.

METHOD FOR THE CREAM CHEESE ICING
1. In a bowl, combine all the lemon cream cheese icing ingredients. Whisk well until you get a smooth, runny icing with no clumps.
2. Pour the icing over the completely cooled lemon brownies and use a small spatula to smooth it out into an even layer. 
3. Allow the icing to set at room temperature for at least 2 hours.


¡LISTO! / DONE!

BIZCOCHITOS CREMOSOS DE CHOCOLATE {MELTING CHOCOLATE PUDDINGS}

julio 03, 2023
Este ha sido creo, el postre de nuestra época, lo tienen en la mayoría de los restaurantes a los que vamos y yo hace mucho que no lo pido, soy muy fan del chocolate y cuando vi esta receta en el semanal, firmada por Berasategui decidí hacerla a ver qué tal me salía. Es muy ligera, bueno en realidad esta receta es muy muy de chocolate y la salsa interior sale en cuanto metes la cuchara. Lo que si creo que es es un pecado mortal total.
  1. This I guess could be the chococolate dessert of our era. Most of the restaurants I go have it in their menus and it´s been a while since I haven´t eaten one, I´m a chocolate freak and when I saw this recipe in a local magazine, from Berasategui, I had no doubt and decided to make it to see how it comes. It´s very light, very chocolatey with the melted fudge-chocolate inside that oozes out as youj put your spoon in. What I really think is that this dessert is a complete mortal sin.

BIZCOCHITOS CREMOSOS DE CHOCOLATE
Tiempo de preparación: 50 minutos
Dificultad: fácil

INGREDIENTES PARA 4 MOLDES
150 gramos de chocolate negro al 70% de cacao
160 gramos de mantequilla
2 huevos grandes
125 gramos de azúcar
90 gramos de harina
4 onzas de chocolate con leche, o 8 onzas o frambuesas o lo que apetezca

PREPARACIÓN
1. Lo primero de todo, fundir el chocolate con la mantequilla en un cazo al baño Maria, con cuidado que el cuenco no toque el agua. Cuando se derriten, darle unas vueltas hasta que se vea suave y brillante. Mientras tanto, batir los huevos con el azúcar hasta que la mezcla doble en volumen. La rapidez dependerá de la batidora eléctrica que usemos.
2. Ahora, incorporar el chocolate y la mantequilla derretidos y mezclarlo lentamente con una lengua de goma. Hay que tener paciencia para mezclar todo bien. Incorporar la harina también en tres tandas, removiendo con cuidado haciendo movimientos envolventes.
3. Encamisamos los moldes con papel de cocina y bien untados de mantequilla, y precalentamos el horno a 180º durante 10 minutos. Colocamos en cada uno de los moldes hasta la mitad la mezcla de chocolate y colocamos una pastilla de chocolate en cada una o como en mi caso dos. Cubrimos esas pastillas con mas mezcla. Si no los vamos a hornear en este punto, se pueden cubrir con plástico y conservar en el frigorífico hasta que se vayan hornear.  Ya los podemos hornear entre 15 y 20 minutos dependiendo de cada horno.

MELTING CHOCOLATE PUDDINGS
Hands on time: 50 minutes
Difficulty: Easy

INGREDIENTS SERVES 4
150gr chocolate with a 70% of cocoa
160gr butter
2 big whole eggs
125gr sugar
90gr flour
4 pieces of chocolate squares

METHOD
1. First of all place the broken-up chocolate, along with the butte in a large heatproof bowl, which should be sitting over a saucepan of barely simmering water, making sure the bowl doesn´t touch the water. Then, when melted, remove it from the heat the give it a good stir until it´s smooth and glossy. While the chocolate is melting, place the sugar and whole eggs in a large mixing bowl, whisk on a high speed with an electric hand whisk until the mixture has double in volume. The time taken will depend on the power of your whisk.
2. When you have a mousse-like mixture, pour the melted chocolate mixture and using a rubber ended spatula carefully fold everything together. Patience is needed here as careful folding movements are needed. Sift the flour over the mixture in three times. Fold the flour with the rest of the mixture 
3. The ramekins will be covered with baking paper and generously brushed with melted butter. Pre-heat the oven to 180ºC for 10 minutes. If you are not going to bake all, keep the ones for later covered in cling film inside the fridge. So divide the mixture between the pudding ramekins and cover them in clingfilm, kept them in the fridge until you need them. Bake them now between 15 and 20 minutes, this will depend on every oven.
¡LISTO! / DONE!

BROWNIE

mayo 02, 2022
Cuando uno tiene ganas de dulce, no nos podemos resistir, bueno al menos yo, así que pongo la excusa de que hoy es día de fiesta y celebración y vamos a terminar nuestra comida con un brownie, que hace mucho que no como chocolate y ya era hora. Estas recetas no tienen mucha historia, batir y mezclar bien así que son bastante fáciles de hacer. 
  1. When you have a sweet tooth, I can´t resist it, well at least me, so I´m going to make an excuse, for example that today it´s a holiday and a celebration day and we´re going to finish our meal with a brownie, because it´s been a while since I ate chocolate, so here we are. These recipes don´t have much complication, whisk and mix well and that´s it so quite easy to make.
Eso si, esta vez he estado muy bien acompañada mientras hacía las fotos para esta entrada.
  1. One thing clear, this time I enjoyed taking pictures for this post in good company.


BROWNIE
Tiempo de preparación 12 minutos + horno 20
Dificultad: Muy fácil

INGREDIENTES PARA UN BROWNIE COMO PARA 8 PERSONAS
175 gramos de chocolate con un 70% de cacao
175 gramos de mantequilla en cubitos y a temperatura ambiente
85 gramos de harina con levadura incorporada
40 gramos de un buen cacao en polvo
Una cucharadita de levadura en polvo
Una cucharadita de sal
5 huevos medianos
300 gramos de azúcar
1 cucharadita de esencia de vainilla
Unas nueces partidas

PROCEDIMIENTO
1. Precalentar el horno a 180ºC. Romper el chocolate en trozos y ponerlo al baño maría junto con la mantequilla. Derretir sobre una cazuela de agua hirviendo procurando que el recipiente no toque el agua durante aproximadamente 5 minutos. Revolver inmediatamente hasta que esté fino. Dejarlo hasta que lo vayamos a usar pero debería estar templado y ligero. 
2. Tamizar la harina, el cacao, la levadura y la sal en un cuenco. Reservar. Usando una batidora manual o eléctrica, batir los huevos, el azúcar y la vainilla juntos en un cuenco grande hasta que hayan doblado su volumen y tengan el aspecto de una mousse.
3. Mezclar los ingredientes secos poco a poco con la mezcla de huevo y remover bien con una cuchara de madera. Echar el chocolate derretido y mezclar bien, debería tener la consistencia de una masa de bizcocho. Añadir las nueces en este punto. 
4. Echar la mezcla en un molde, cuando esté formará una costra que parece que se rompe un poco pero estará muy blandita en el medio. Dejar el molde que se enfríe, pasar el brownie a una bandeja o tabla y cortarla en cubos grandes. Para terminar, se puede adornar con azúcar glas o con polvo de cacao también.

BROWNIE
Preparation time: 12 min plus 25 min oven
Difficulty: Very easy

INGREDIENTS SERVES 8 PEOPLE
175 gr plain chocolate with 70 per cent cocoa
175 gr butter, room temperature and cubed
85 gr self-raising flour
40 gr good quality cocoa powder
1/4 tsp baking powder
1/4 tsp salt
5 medium eggs
300 gr sugar
1 tsp vanilla essence
walnuts roughly chopped

METHOD
1. Preheat the oven to 180ºC. Break the chocolate into squares and put in a heatproof bowl withthe butter Melt over a pan of barely simmering water for 5 minutes. Make sure the base of the bowl does not touch the water. Take off the heat. It will still be lumpy at this stage so stir immediately until smooth. Leave until ready to use, but it should be warm and runny. 
2. Stir the flour, cocoa powder, baking powder and salt into a bowl. Put to one side. Using either electric beaters or a hand whisk, whisk the eggs and sugar and vanilla essence together in a large mixing bowl, until thickened and mousse like. 
3. Stir the sifted flour and cocoa a quarter at a time into the egg mixture and stir with a wooden spoon until well combined. Pour in the melted chocolate and stir throughly to mix, it should have a batter like consistency. Finally fold the roughly chopped walnuts evenly through the mixture.
4. Pour into the prepared tin and bake for 25 minutes. It should form a crust on top that is just starting to crack around the edges, and yet still be soft in the centre. Put the tin on a wire rack and leave to cool Transfer the brownie and its paper to a board and cut into squares. To finish you can also dust with either icing sugar or cocoa powder.

¡LISTO! / DONE!

PASTAS DE MANTEQUILLA {JAMMIE DODGERS SHORTBREAD BISCUITS}

febrero 14, 2022
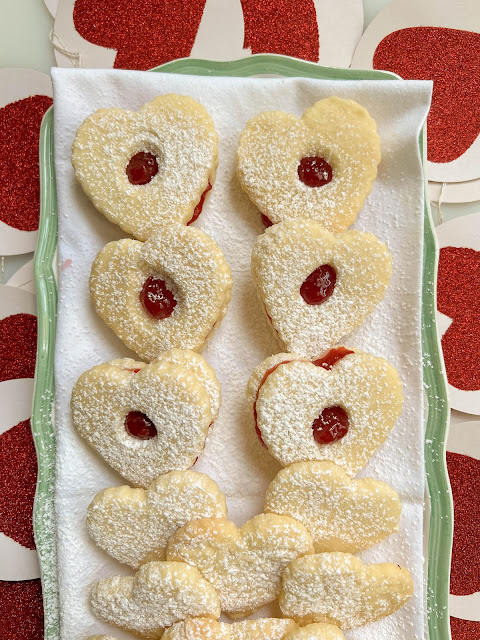
El nombre de estas pastitas Inglesas tipo sandwich con un relleno de mermelada es Jammie Dodgers. Son unas de las primeras galletas que me compre en Inglaterra porque me chiflan todas las pastas que llevan un relleno de mermelada, así que cuando vi en el supermercado aquel paquete rojo (no se me olvida nunca) con un montón de galletitas rellenas de mermelada de fresa o frambuesa (de eso ya no me acuerdo) me las compré, porque siempre pasábamos hambre la verdad. 
  1. The name of these English biscuits sandwiched together with rasperry or strawberry jam is Jammie Dodgers. These are the first biscuits I bought when in England because I love any kind of shortbread biscuits that have raspberry or strawberry jam filling, so when I saw this red package in the supermarket(I will never forget this) full of biscuits with my favorite preserve (I can´t remember which one was it) I simply bought them, because most of the time we were starving really.
Aunque no siempre las he hecho tipo sandwich, hoy traigo esta receta de pastas porque es la mejor que tengo para hacer, la que mejor sale y la tengo anotada en ese cuaderno tan viejo que conservo desde antes de estar casada. San Valentín tiene la culpa de que tengan la forma de corazón y las que no llevan mermelada, las he hecho para estrenar este rodillo tan bonito que me regaló mi hija en reyes y que hace que tus pastas adquieran otro nivel, al menos para la vista.
  1. I haven´t made them sandwich type always, but believe me this recipe is the best one I have, and I had it written in that old notebook I still keep since before I was married. Blame Valentine´s for the heart shape if you want and the other ones that haven´t got jam, were made because I wanted to use my use roller pin, this one that my daughter gave me as a christmas present which bring the biscuits to another level.


GALLETAS DE MANTEQUILLA RELLENAS
Dificultad: Muy fácil
Tiempo de preparación: 20 min + 12 minutos de horno

INGREDIENTES PARA 25 galletas - 12 con relleno
75 gramos de azúcar glas
150 gramos de mantequilla muy muy blanda
150 gramos de harina, tamizada
75 gramos de maizena
1 cucharadita de café de vainilla
Una pizca de sal
Mermelada de fresa o frambuesa o la que se quiera

PROCEDIMIENTO
1. Precalentar el horno a 160ºC. Preparar también una bandeja con papel encerado o una bandeja de silicona 
2. Batir la mantequilla y el azúcar hasta que estén bien mezclados. No se tarda mucho, un par de minutos. 
3. Añadir la harina, la maizena, la vainilla y la sal. Mezclar todo bien hasta que se forma una bola.
4. Usar el rodillo para extender la masa entre dos papeles encerados hasta llegar a unos 2mm. En este punto cortar las pastas con un cortador de la forma que sea. Se vuelven a juntar los sobrantes y se sigue amasando y cortando galletas hasta terminar. 
5. Si se hacen tipo sandwich, se hace un circulito o cualquier otra forma mas pequeña en la que va a ir en la parte de arriba y se hornean en la parte central del horno durante 12 minutos o hasta que empiezan a coger algo de color en las esquinas. 
6. Cuando pase el tiempo, se dejan que se enfríen totalmente. 

SHORTBREAD BISCUITS - JAMMIE DODGERS
Preparation time: 20 mins + 12 in the oven
Difficulty: Very easy

INGREDIENTS MAKE 25 biscuits, 12 if you make them sandwiched
75g icing sugar, sieved
150g unsalted butter, softened
150g flour, sieved
75g cornflour, sieved
1/4 tsp vanilla extract
Pinch of salt
Strawberry jam or your favorite preserve

METHOD
1. Preheat the oven to 160ºC. You will need a  baking tray lined with a silicone baking sheet or baking parchment.
2. Beat the butter and sugar together until combined. This will only take a couple of minutes.
3. Add the flour, cornflour, vanilla extract and salt. Mix everything together to form a smooth firm dough.
4. Roll the dough out between two sheets of baking parchment until 2mm thick. Once rolled, cut the biscuits with your favorite shape cutter. You may need to bring the offcuts together again to cut more biscuits.
5. If you are going to make them sandwiched, make a small hole in the biscuit which is going to go on top and bake them in the center of the oven for 12 minutes. They musn´t have a deep golden baked colour, just around the edges.
6. When done, leave to cool completely. Now you can add the jam.
¡LISTO! /DONE!

MANTECADOS DE ALMENDRA {ALMOND COOKIES - MANTECADOS}

enero 05, 2022
Hay una tienda en el centro de Vitoria abierta desde 1896, dedicada al café y al te y a otras muchas cosas ricas. Es pequeñita y me encanta. Mi madre solía comprar siempre el café allí y yo lo he comprado durante un tiempo online también. No les estoy haciendo propaganda ni es una colaboración, simplemente que las mantecadas que he hecho hoy son de un recetario que tengo de esta tienda desde hace mil años. El mantecado es un dulce típico de la repostería Española cuya característica mas particular es que se amasa con manteca de cerdo. Su origen dicen que es Andaluz y muy muy antiguo. En mi casa siempre se ha comido en Navidades. Es la primera vez que los he hecho y tengo que repetirlos porque cometí un fallo tremendo, ser demasiado impaciente. Luego os diré por qué. Que hoy es la noche de Reyes y que tenía que haber metido esta entrada al principio de las navidades, cierto, pero es que como todas, en navidad disfrutamos mas de nuestras familias que de internet, al menos yo.
  1. There is a small shop in the center of Vitoria opened since 1896, one of those shops where they sell coffee and tea and many other delicacies. It´s very small and I love it. My mom used to buy coffee there always and I´ve ordered some on line too. This is not propaganda of any kind or any other colaboration with the shop, it´s just that these cookies (mantecadas) that I made today, come from a small booklet full of recipes from the shop which I´ve been keeping before I got married. One of the characteristics of the recipe is that uses lard instead of butter. The recipe comes from Andalucía and it´s really old, around 16th century. At home we always eat them at Christmas. This is the first time I´ve made them and I have to repeat them because I made a terrible mistake thanks to my impatience. I´ll write about it later. Today is one of the most important nights for me and my family, the night when the three kings come to the houses, the three wise men´s night. I know I know I should have posted this before Christmas but during the holidays I prefer to stay with the family than sitting with the laptop, so that´s why the delay. 


MANTECADOS DE ALMENDRA
Tiempo de preparación: Lo que tardas en mezclar los 4 ingredientes y 15 minutos de horno mas el enfriado.
Dificultad: Fácil pero con paciencia

INGREDIENTES PARA UNOS 15 MANTECADOS
200 gramos de harina
200 gramos de azúcar
200 gramos de almendra molida
200 gramos de manteca de cerdo
Azúcar glas para decorar

PROCEDIMIENTO
1. Colocar todos los ingredientes en un bol y trabajarlos hasta formara una pasta. Se puede usar un aparato amasador. 
2. Extender la pasta y cortar los mantecados. Precalentar el horno a 180º y hornearlos durante 15 minutos o hasta que empiezan a estar dorados. Cuando se enfrían se espolvorean de azúcar glas.
3. Cuando salen del horno, hay que tener mucha paciencia, no tocarlos y dejarlos que se enfríen bien, lo contrario que hice yo, que por sacar las fotos para esta entrada, me precipité y acabé rompiendo casi todos los mantecados, así que mucha paciencia. Estaban buenísimos, y también comimos los rotos. 

ALMOND COOKIES - MANTECADOS
Hands on time: What it takes you to mix the 4 ingredients plus the 15 minutes in the oven and the cooling time.
Difficulty: Easy with patience. 

INGREDIENTS MAKES 15 COOKIES
200gr all purpose flour
200gr sugar
200gr ground almonds
200gr lard
Icing sugar to decorate

METHOD
1. Place all the ingredients in a bowl and mix well until a paste is formed. You can use a food processor to do so.
2. Roll the dough and cut the cookies. Preheat the oven to 180º and bake them for 15 minutes or until golden. When completely cold, sprinkle with icing sugar.
3. When you take them out of the oven, please be patience and don´t touch them. Let them cool down completely which is the contrary I did, because I tried to put them in trays to be able to take the pictures for this post and what I did was break them all into small pieces. They were great because we also ate the broken ones.
¡LISTO! / DONE!

BIZCOCHO INTELIGENTE {SMART CAKE}

octubre 18, 2021
¿Y por qué se le llama inteligente?, pues imagino que porque el mismo separa la masa en tres partes cuando está en el horno. La primera un pudding, la segunda un flan y la tercera, la capa de arriba un bizcocho super esponjoso. Para mucha gente esta no es una receta nueva, el pastel inteligente lo tengo guardado en archivos desde mis primeros días de Pinterest, ahí tengo una carpeta con "recetas para probar" que miro muy pocas veces simplemente porque se me olvida. Por fin le he echado un vistazo y decido seguir la receta que tengo archivada. Hoy no hay fotos del paso a paso, no pensaba poner la receta en el blog, simplemente la he hecho porque tenía invitados a comer pero al final, estoy aquí porque las cantidades que vienen en la receta son para un regimiento y no para un molde cuadrado pequeño, como indicaba la receta, porque a mí me han salido dos moldes y dos bizcochos grandes. He creído que tenía que mencionarlo.
  1. And why is it called smart cake?, well I guess it´s because it separates de batter in three layers, the first one a pudding like, the second one a flan and the third one in a spongy cake. For many people this is not a new recipe, the smart cake has been kept in my files since Pinterest was created, there I have a small folder with "recipes to try" that I don´t look at so often, simply because I forget it. I went through it at last and made this recipe. There are not step by step pictures today because I wasn´t going to post it, I just made it because I had guests at home but in the end, I´m here because the amounts of the ingredients in the recipe are not correct and I made two big cakes instead of one made in those small square brownie molds. I think I had to mention it.
Es bastante molesto cuando sigues la receta y te das cuenta que la persona que la está escribiendo no la ha hecho previamente y está poniendo las cantidades según le va. Yo personalmente prefiero hacerla, si me sale mal decirlo y si me sale bien pues también. La receta es estupenda y muy muy fácil. La mezcla queda muy líquida y además quedan algunos grumitos, va a salir asi y no importa.
  1. It´s a bit disturbing when you follow a recipe and you realise that the person posting it is just writing it without previously making it. I personally prefer to try it first, if it comes out terribly I say it and if it´s perfect I say it too. The recipe is gorgeous and very very easy. The mixture is quite liquids and with some lumps, it´s not important.

PASTEL INGELIGENTE
Tiempo de preparaciòn: 10min aprox para preparar y 60' de horno
Dificultad: Muy fácil

INGREDIENTES PARA LA RECETA ORIGINAL - SALEN DOS BIZCOCHOS O UN MOLDE GRANDE.
8 yemas
8 claras a punto de nieve
1 litro de leche tibia
250 gramos de mantequilla derretida y fria
280 gramos de azúcar
225 gramos de harina
Ralladura de 1/2 limón 
2 cucharadas de esencia de vainilla
Azúcar glas para decorar

PROCEDIMIENTO
1. Precalentar el horno a 180º. Forrar el molde con papel encerado para que sea fácil desmoldarlo después. Batir las yemas con el azúcar hasta que espesa la mezcla. Añadir la vainilla, la mantequilla derretida, la leche y la harina. Mezclar todo bien, con varillas metálicas. 
2. Montar las claras a punto de nieve.
3. Mezclar bien con movimientos envolventes. Queda líquido y con algunos grumitos.
4. Meter en el horno a 180º durante 10 minutos. Bajar la temperatura a 160º y tenerlo otros 50 minutos mas.
4. Dejar enfriar dentro en el molde. Desmoldar. Echar azúcar glas por encima cuando está frio.

PEQUEÑA NOTA 
LAS CANTIDADES SON SUPUESTAMENTE  PARA UN UNICO PASTEL, YO LO DIVIDÍ EN DOS MOLDES PORQUE LA CANTIDAD ERA ENORME. LOS DOS BIZCOCHOS HAN SALIDO PERFECTOS, Y PIENSO QUE CALCULANDO LA MITAD DE LOS INGREDIENTES SALDRÁ TAMBIÉN FENOMENAL.

SMART CAKE
Hands on time: 10min aprox to make the batter and then 60 min in the oven
Difficulty: Very easy

INGREDIENTS FOR THE ORIGINAL RECIPE - IT SERVES TWO BIG TINS
8 egg yolks
8 egg whites
1 litre of milk room temperature
250gr melted butter and cold
280gr sugar
225gr flour
Lemon zest
2tbsp vanilla estract
Some icing sugar to sprinkle when finished

METHOD
1. Pre heat the oven to 180ºC. Line the tin of the cake so it will come out easily later on. Beat the egg yolks with the sugar until thickens. Pour the vanilla, the melted butter, the milk and the flour. Combine all well with the electric whisker.
2. Whisk the egg whites until they form soft peaks
3. Put the mold in the oven at 180º for 10 minutes and then turn the oven down to 160ºC and leave it there for another 50 minutes.
3. Leave the cake in the tin until completely cold. Sprinkle with icing sugar.

SMALL NOTE
THE AMOUNTS SPECIFIED IN THIS RECIPE WERE APPARENTLY JUST FOR ONE CAKE BUT I HAD TO DIVIDE IT IN TWO TINS BECAUSE THE AMOUNT OF BUTTER WAS TOO BIG. BOTH CAKES CAME OUT PERFECT AND I THINK CALCULATING JUST HALF OF THE INGREDIENTS WILL BE FINE. 

¡LISTO! /DONE!

MOUSSE DE CHOCOLATE {CHOCOLATE MOUSSE}

octubre 04, 2021
He hecho montones de versiones de mousse de chocolate, algunas mejores que otras aunque siempre me parecía que no eran lo suficientemente "airosas" y esponjosas. Algunas me salían demasiado dulces, otras con grumos. Algunas usaban demasiado nata así que al final parecían natillas de chocolate. Otras con poco gusto o fuertes en sabor a chocolate.El caso es que no me rindo y aquí sigo intentando y creo que con esta que traigo hoy es con la que me voy a quedar.
  1. I´ve made thousands of versions of chocolate mousse, some better than the others but I´ve always thought that some weren´t fluffy enough. Some used too much cream so the end result is more like a chocolate custard. Others came out too sweet, too grainy, some not chocolatey enough or with too much chocolate in flavour, well the thing is that I never give up so here I am trying another one and you know what, the one I´m posting today is the one I think that is going to be a keeper.
Cada bocado se derrite en la boca y encima es un postre elegante. Obviamente no es un postre para dietas ni tampoco bajo en calorías pero creerme que compensa cada cucharada, vamos que las cosas con moderación no son malas.
  1. Each bite melts away in your mouth and it looks elegant on the table. Obviously this is not a diet friendly item or a low calorie dessert but it´s worth every bit of it. All things in moderation of course.


MOUSSE DE CHOCOLATE
Tiempo de preparación: 10 minutos mas 4 horas de reposo en el frigorífico o la víspera
Dificultad: Muy fácil

INGREDIENTES PARA 6 PERSONAS
150ml de nata
75ml de leche entera
180 gramos de chocolate negro con un 70% cacao
75 gramos de chocolate co leche con un 40% de cacao
3 yemas de huevo
3 claras de huevo
20 gramos de azúcar glas

PROCEDIMIENTO
1. Se cortan los chocolates con cuchillo o se rallan con un aparato para rallar chocolate. En un cazo se hierven suavemente la nata y la leche. Al hervir, se retiran del fuego y se vierten sobre los chocolates picados colocados en un cuenco. Se deja unos minutos así, sin tocar para que el chocolate se derrita completamente. Se remueve el conjunto con una varilla o una cuchara de palo y poco a poco se integran hasta que se forma una crema de chocolate.
2. Se incorporan las yemas, se rompen y se mezclan rápidamente. 
3. En un cuenco se montan las claras y se añade el azúcar glas hasta que monten ligeramente y tomen aspecto de merengue firme y brillante. 
4. En cuanto esté el merengue, usando una cuchara de metal, se mezcla una cucharada de merengue con el chocolate para aligerarlo un poco, se incorpora poco a poco el resto. Hay que tener paciencia en este punto y hacerlo despacio para que no pierda el aire. Que quede una mousse esponjosa y suave. Se divide la mezcla en diferentes recipientes o copas, se cubren para meter en el frigorífico para que no cojan olores y se dejan en el frigorífico un mínimo de 2 horas aunque cuanto mas tiempo mejor.

CHOCOLATE MOUSSE
Hands on time: 10 minutes plus 4 hours resting in the fridge or simply leave it overnight
Difficulty: Very easy

INGREDIENTS SERVES 6
150ml whole cream
75ml whole milk
180grams dark chocolate 70% cocoa
75grams milk chocolate 40% cocoa
3 egg yolks
3 egg whites
20grams icing sugar

METHOD
1. Cut both chocolates with a knife or simply grate them with a chocolate grater. In a bowl, boil the cream and the milk. When done, remove it from the heat and pour it over the grated chocolates. Leave them to rest for a couple of minutes until the chocolates are melted. Combine both chocolates and the milk little by little until a velvety cream is formed. 
2. Stir in the yolks, break them and mix them with the chocolate custard inmediately
3. In a bowl, whisk the egg whites to the soft-peak stage, then whisk in the sugar, about a third at a time, then whisk again until the whites are glossy.
4. When the whites are ready, and using a metal spoon, fold a tablespoon of the egg whites into the chocolate mixture to loosen it, then carefully fold in the rest. You need to have patience here, it needs gentle folding and cutting movements so you retain the air. Divide the mousse between the ramekins or little bowls and chill for at least 2 hours, covered with clingfilm. We can serve it with red fruits or some chocolate or simply with softly whipped cream on top.
¡LISTO!/DONE!

GALLETAS DE AVENA Y PLATANO {BANANA AND OATMEAL COOKIES}

julio 28, 2021
Aquí en Donosti la verdad es que ola de calor como que no estamos atravesando, dan mas ganas de chocolate caliente que de un tinto de verano la verdad. Así que hoy va de galletas, eso si, super sanas.
Recuerdo que esta receta me la dio alguien y la tenía escrita en un trozo de papel dentro de mi agenda, no tenía el tiempo de horno escrito así que las he hecho a ojo, mas o menos cuando pensé que estaban hechas así que habrá que comprobar el horno de cada uno. Yo en 10 minutos a 180º.
  1. Here in Donostia we are not going through any heat wave really, I feel we are dying for a cup of hot chocolate more than a summer wine, which is red wine with sweet soda water we call gaseosa or just lemon. So here I am posting a cookies recipe, very healthy ones by the way. I remember somebody gave me this recipe long ago and that I had it written on a piece of paper inside my agenda. There wasn´t any oven directions to bake these cookies so I more or less made it by eye and took them out from the oven when I thought they were ready, about 10 minutes and at 180º.
Son muy fáciles de hacer y para un tentenpié no están nada mal. Como a mí me encantan las pasas le he añadido unas cuantas, pero se pueden añadir dátiles o no ponerles nada.
  1. They are easy to make and for a snack they are really good. As I love raisins I´ve put some in the recipe but you can add dates or simply nothing to the dough.

GALLETAS DE AVENA Y PLATANO
Tiempo de preparación: 10 minutos
Dificultad: Super fáciles

INGREDIENTES 
1 platano
3 tazas de copos de avena
Pasas de corinto

PROCEDIMIENTO
1. Aplastar el platano y mezclar con los copos de avena y las pasas.
2. Precalentar el horno a 180º
3. Hacer bolitas del tamaño que se quiera, hornearlas durante 10 minutos

BANANA AND OATMEAL COOKIES
Hands on time: 10 minutes
Difficulty: Super easy

METHOD
1. Smash the banana with a fork and mix with the oatmeal and the raisins
2. Preheat the oven to 180º
3. Form small balls the size of your preference and bake them for 10 minutes


¡LISTO! / DONE!

MANZANAS ASADAS CON SALSA DE ARÁNDANOS {ROASTED APPLES WITH BLUEBERRY SAUCE}

mayo 24, 2021
Un postre muy simple, hecho con ingredientes que tenemos en casa o que son fáciles de comprar y que además te deja un olor en la cocina increíble. Al mal tiempo buena cara, aquí seguimos medio de invierno, yo encantada de la vida, por eso aprovecho cualquier momento para encender el horno y además como he dicho unas frases mas arriba sin mucho trabajo. Normalmente cuando aso manzanas, utilizo reinetas, creo que es la primera vez que utilizo manzanas golden para asar. En 40 minutos se tiene un postre buenísimo.
  1. This is a very easy and very simple dessert, with most of the ingredients we have at home or that we can easily buy and leaves an incredible aroma in the kitchen. When the going gets tough, the tough get going, and it looks as if we were still in the middle of winter, something that makes me be happier, so I´m taking the chance of turning the oven on without too much work. Normally when I bake apples I use a variety we have which is called "reineta" and I think this is the first time I have baked apples of a variety we call "golden". In 40 minutes you get a gorgeous dessert.

MANZANAS ASADAS CON SALSA DE ARÁNDANOS
Tiempo de preparación en total: 40 minutos
Dificultad: Super fácil

INGREDIENTES PARA 6 PERSONAS
6 manzanas golden
4 cucharadas de zumo de arándanos
4 cucharadas colmadas de nata y un poco mas para montar
4 cucharadas de azúcar moreno
2 cucharadas de mantequilla

PROCEDIMIENTO
1. Precalentar el horno a 180º. Quitar el corazón de las manzanas dejando el fondo. Colocar las manzanas en un recipiente para horno y pinchar la piel varias veces. 
2, En una cazuela, calentar las cucharadas de nata con el zumo de arándanos, el azúcar y la mantequilla hasta que esté todo bien disuelto. Echar este sirope por encima de las manzanas y hornearlas durante 30 min. a 180º. 
3. Montar la nata restante y dejar enfríar. Servir las manzanas con la salsa de arándanos y una nube de nata por encima.

BAKED APPLES WITH BLUEBERRY SAUCE
Hands on time: 40 minutes
Difficulty: Very easy

INGREDIENTS SERVES 6
6 apples I´ve used golden variety but you can use any other of your choice
4tbsp or 3/4 cup of blueberry juice
4tbsp or 3/4 cup of whole cream and some more to whip 
4tbsp or 3/4 cup of brown sugar
2tbsp butter

METHOD
1. Preheat the oven to 180º. Using an apple corer, cut out the cores, leaving a bit of the bottom intact. Arrange the apples in a baking dish and pinch the skin of the apples a bit.
2. In a saucepan, put the whole cream, the blueberry juice, the sugar and the butter until everything is heatedd and disolved. Pour this sirope over the apples and bake them during 30 minutes.
3. Whip the rest of the cream and leave it to rest. Serve the apples with the blueberries sauce over them and a dollop of the whipped cream.

¡LISTO! /DONE!

BIZCOCHO BLANDITO DE LIMÓN CON COMPOTA DE ARÁNDANOS {LEMON TENDERCAKE WITH BLUEBERRY COMPOTE

mayo 03, 2021
No sabéis que rico es este bizcocho, básicamente porque es diferente y delicado en sabor. Además, tampoco es excesivamente dulce teniendo un cierto sabor a limón, muy sutil, que no cansa, no como esos pasteles que son ácidos en exceso y difíciles de comer. Este bizcocho es de Nigella Lawson a la que recurro para los días que quiero una repostería diferente. Es super super fácil y ayer que fue el día de la madre, me vino genial. Además, como ella apunta en su receta es vegano.
  1. You can´t imagine how good this cake is. It´s different, it has a miraculous texture, very delicate in flavour, scent with lemon rather than tingling with it. This cake comes from my Nigella Lawson books that I use when I want to make something different for dessert. It´s extremely easy to make and as yesterday was mother´s day it was perfect. Besides as she notes in her recipe, it´s vegan!.
La única cosa que hay que tener en cuenta en la receta es que no hay que batir la lata de leche de coco y que cuando se abra solo utilizaremos la parte cremosa y dejar el líquido en la lata. Ni se os ocurra utilizar una lata de leche de coco baja en calorías. He utilizado un molde de 18 centímetros.
  1. Don´t shake the tin of coconut milk, this is just the most important thing to make in this recipe, as it´s best to get as much of the thick creamy part as possible. But she adds that we are not allowed even to think about using light coconut milk. I´ve used a 18cm cake tin.


BIZCOCHO BLANDITO DE LIMÓN CON COMPOTA DE ARÁNDANOS
Tiempo de preparación: 20 minutos y 30 minutos de horno
Dificultad: Muy fácil

INGREDIENTES PARA 4 PERSONAS
PARA EL BIZCOCHO
225 gramos de harina
1 1/2 cucharadita de levadura en polvo
1/2 cucharadita de bicarbonato
1/4 de cucharadita de sal marina fina
150 mm de aceite de oliva (un poco mas para engrasar el molde)
150 gramos de azúcar
275 gramos de leche de coco (solo la crema recordar)
2 limones - las cáscaras ralladas totalmente + 3 cucharadas del zumo de limón
PARA LA COMPOTA
150 gramos de arándanos
1 cucharada grande de zumo de limón
1 cucharada grande de azúcar
50 mm de agua fría y tener preparada un poco mas
1 cucharadita y 1/2 de harina de maíz
PARA EL GLASEADO
200 gramos de azúcar glas
Agua
1 cucharada de zumo de limón

PROCEDIMIENTO
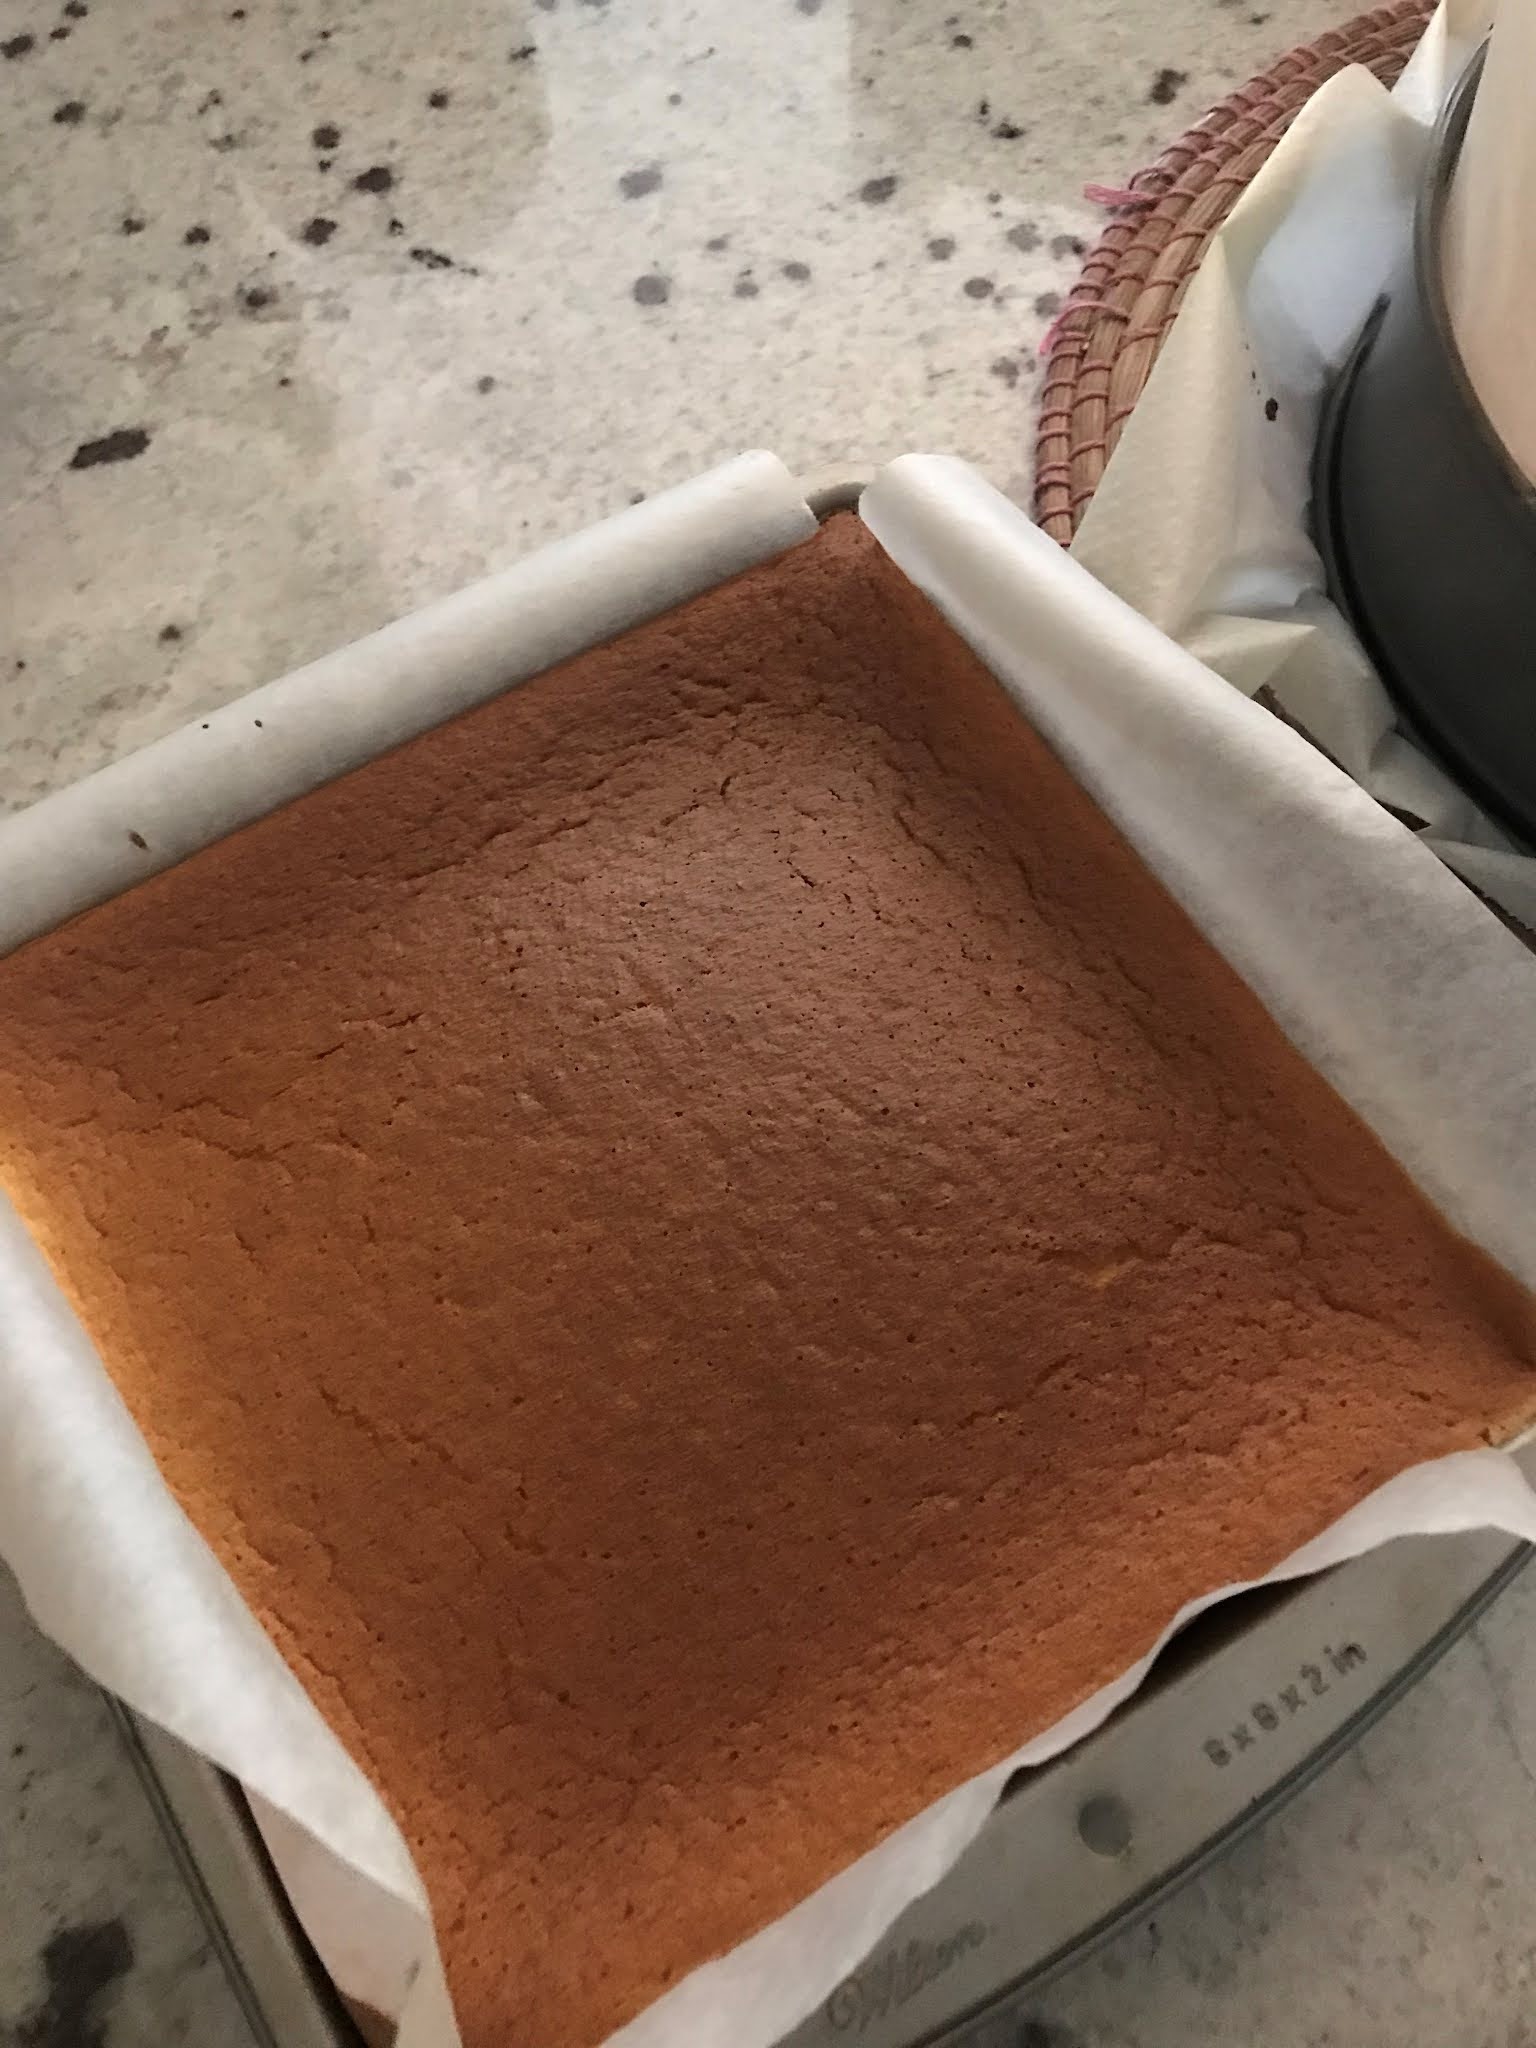
1. Precalentar el horno a 180º y preparar el molde con papel encerado como en la foto. Engrasarlo bien.
2. Mezclar la harina, la levadura en polvo, el bicarbonato y la sal en un recipiente lo suficientemente grande para poder añadir luego los ingredientes líquidos.
3. En otro recipiente, batir el aceite, el azúcar, la leche de coco, la ralladura de limón y el zumo de limón todo junto. Mezclar los ingredientes secos con los líquidos, removiendo bien. Echar todo en el molde y hornearlo durante 30 minutos. Aunque parezca que está muy blandito luego se asienta un poco. El mío se rompió un poco al desmoldarlo, pero para echar el glaseado le di la vuelta. Mientras tanto hacer la compota de arándanos y el glaseado.
4. Poner los arándanos, el zumo de limón, y el azúcar en un cazo y llevar a ebullición. Bajar el fuego y cocinar lentamente durante un par de minutos o hasta que se ablanden los arándanos. Apartar del fuego y en un vasito, mezclar la harina de maíz con el agua fría y disolverla super bien. Añadirla a la compota y remover hasta que empieza a hervir y a espesar, aproximadamente 30 segundos. Si por lo que sea la compota se pone muy espesa, añadir un poco de agua y listo. Reservar en una jarrita. 
5. Para hacer el glaseado, se mezcla el azúcar glas, el agua y el zumo de limón hasta conseguir una pasta. Montar el bizcocho en el último momento, servir un poco mas de compota y glaseado si se quiere.

LEMON TENDERCAKE WITH BLUEBERRY COMPOTE
Hands on time: 20 minutes + 30 minutes in the oven
Difficulty: Very very easy

INGREDIENTS - SERVES 4
FOR THE CAKE
225grams plain flour
1 1/2 teaspoons baking powder
1/2 teaspoon bicarbonate of soda
1/4 teaspoon sea salt
150 millilitres vegetable oil, plus more for greasing
150 grams caster sugar
275 grams coconut milk (see recipe introduction)
2 lemons, grated zest and 3tbsp of juice
A springform cake tin
FOR THE COMPOTE
150 grams blueberries
1 tbsp lemon juice
1 tbsp caster sugar
50mm cold water plus 1 1/2 teaspoons
1 1/2 teaspoons cornflour
FOR THE TOPPING
200 grams blueberries
1tbsp lemon juice
Water, added little by little

METHOD
1. Preheat the oven to 180º. Grease the sides and line the base of your springform cake tin with baking parchment as in one of the pictures.
2. Combine the flour, baking powder,, bicarbonate of soda and salt in a bowl large enough to take all the other ingredients later.
3. In a wide batter jug or another bowl, whisk the oil, sugar and coconut milkk together, followed by the lemon zest and juice. Combine the dry ingredients with the liquid ingredients, whisking to mix well, then pour into the prepared tin and bake for 30 minutes. Transfer to a wire rack and leave the cake to cool completely in its tin. It looks as if it was going to break because it´s a bit soft, but it settles later. Mine broke a bit when I removed it from the cake tin, but I turned it upside down when I served it before adding the topping. While it´s on the wire rack, we can make the compote.
4. Put the blueberries, lemon juice, caster sugar and the 50ml of cold wateer into a saucepan and bring to the boil, then turn down the heat and simer, stirring gently every now and then again for a couple of minutes or until the blueberries have softened. Take the pan off the heat and, in a small cup, slake the cornflour with the cold water and stir this paste into the pan of blueberries, making sure you scrape every last bit out. Stir together, put the pan back over the heat and stir for about 30 seconds, by which time the sauce will have started bubbling again and will have thickened. If you feel it has become too thick, simply add a little more water and stir it in over the heat. Pour the compote into a small jug to let it cool.
5. To make the topping, simply mix the icing sugar with the lemon juice, and start adding water little by little until you get a paste that you can spread over the cake.

¡LISTO! / DONE!
 
Copyright © decocinasytacones. Diseñado con por Las Cosas de Maite